Smart mailbox notifiers are a fun and challenging project that have increased in popularity thanks to microcontrollers like the ESP8266 and others. Often located in a remote environment that will often need to be able to be powered by a battery and solar and take advantage of deep sleep to conserve battery life. My mailbox presented an extra challenge in the fact that there is no door on it in order to add a switch that would detect it opening once mail was inserted in it. It is this reason I decided to use a Micro Lidar based distance sensor to measure the distance across the mailbox in order to determine if there is something in the box. This will be powered by a solar based ESP8266 running ESPHome and sending me notifications via Home Assistant.
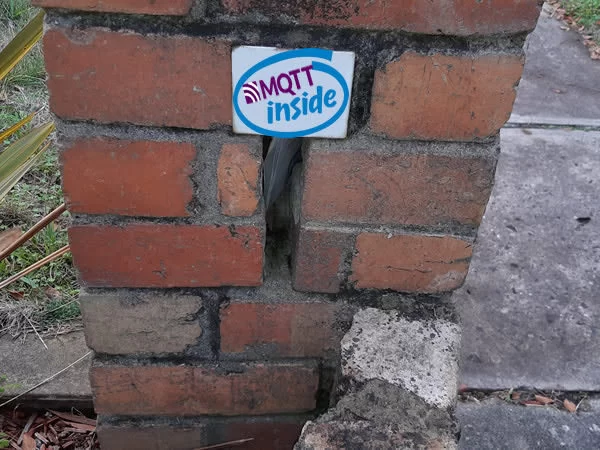
To further explain the challenges I have with my letterbox is that when it was built in the late 1940s, all they did to create a slot for the mail was to create a vertical gap in the bricks. When the mail gets inserted into the box, it generally sits upright leaning against the bricks and can often fall out the front if not inserted fully. Short of replacing the box and fence with a better design, my plan is to regularly capture when mail is sitting is this position by measuring the distance across the 14 cm wide box, if the box changes to a width less than 11 cm then there is clearly something sitting upright in the slot and Home Assistant will send me a notification.
It’s not a perfect solution as thanks to deep sleep this measurement is only taken every 25 minutes and if anything like cards manages to get through and lay flat it will miss it, but it does regularly notify me when mail is sitting in the precarious position that I am most concerned about and the sensor also auto resets once the mail is removed.
Hardware wise, I have chosen the following items to run this project.
Wemos D1 Mini Pro
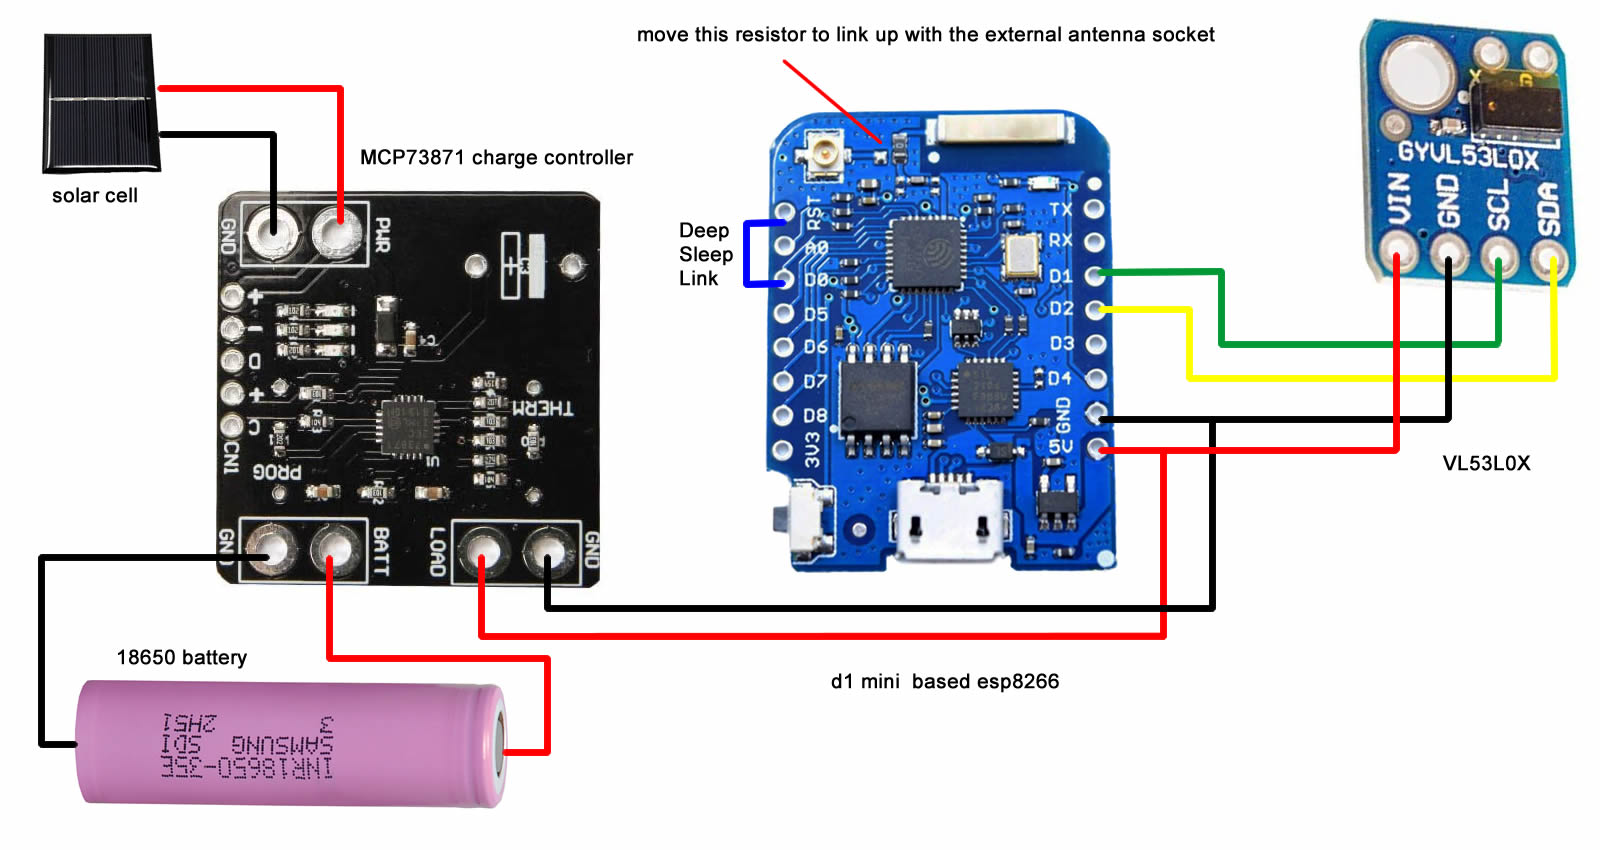
I chose this esp8266 microcontroller as I had it on hand, and it comes with an option external antenna which may be needed to get to my Wi-Fi. There may be other esp8266’s or esp32’s out there that use less power, but this has been running ok off an 18650 battery with deep sleep on. Remember, when using a D1 Mini with the optional antenna, you will need to move the zero ohm resistor between the onboard antenna and the antenna socket.
VL53L0X time of flight sensor
This mini laser distance works with the i2c bus and accurately reports distances up to 2 m. I thought this was a nice low profile design that I could keep relatively weatherproof in the mailbox.
VL53L0X time of flight sensor on Aliexpress
3.7v 18650 battery and holder
I had several of these batteries harvested from laptops. Normally rated at 3.7v, many of these in my collection measured up to 4.2v at around 2300mAh so I chose the best out of pile.
example of a 18650 battery at BangGood
18650 battery holder on BangGood
Solar Panels
I used 2 of these 5v panels wired in parallel, I have done no calculations on this, so it maybe overkill, but they did fit nicely in the waterproof housing I had, and they seem to keep the 18650 charged well.
5V 1.25W 250mA Solar panels on BangGood
Solar Charge PCB
I use this MCP73871 Solar PCB that I got from Aliexpress. It seems like a knockoff of an older adafruit PCB, but it works well. I have seen some people use the cheap TP4056 to do the same job, but this device should not be used to power a load and charge at the same time, hence why I went with the MCP73871 which apparently is better designed to handle this task. An optional 10k thermistor can be added to check the battery temperature too.
Weatherproof housing
I had this unused housing with a clear lid from Jaycar kicking around, and it turned out to be a perfect fit for two of the solar panels listed above.
jaycar sealed polycarbonate enclosure with clear lid
The Circuit
The circuit is fairly basic as shown below, click on the pic for a larger view.
Code
As I use Home Assistant as an automation platform, I chose to use ESPHome along with MQTT as the code for this project. MQTT is used as it is fast and said to use less power than the ESPHome API. I also have created MQTT sensors in Home Assistant that report the last state of the D1 mini sensors, regardless of it being in Deep Sleep or not. I also have an input Boolean switch in Home Assistant that will force the D1 mini on next wake up to stay out of deep sleep mode when activated. This is handy if you ever want to update the device.
ESPHome Config
Below is My ESPHome config which is pretty basic just enabling deep sleep, OTA updates, the i2c bus, the vl53l0x sensor and basic MQTT settings. On the Wi-Fi side, I have chosen to use a static IP as it is said to be faster to connect than a dynamic IP and therefore use lower power consumption (remember to alter this and Wi-Fi/MQTT credentials to suit your own network).
esphome:
  name: letterbox
  platform: ESP8266
  board: d1_mini

wifi:
  power_save_mode: light
  networks:
  - ssid: my-main-ap
    password: its-secret
  - ssid: my-failback-ap
    password: its-secret

  manual_ip:
    static_ip: 192.168.1.4
    gateway: 192.168.1.1
    subnet: 255.255.255.0

# Enable logging
logger:

deep_sleep:
  id: deep_sleep_1
  run_duration: 50s
  sleep_duration: 25min

i2c:
  sda: D2
  scl: D1

sensor:
  - platform: vl53l0x
    name: "VL53L0x Distance"
    address: 0x29
    update_interval: 5s
    long_range: False
    filters:
      - calibrate_linear:
          # Map 0.0 (from sensor) to 0.0 (true value)
          - 0.0 -> 0.0
          - 12.0 -> 10.0
  - platform: wifi_signal
    name: "Letterbox WiFi Signal"
    update_interval: 10s

mqtt:
  broker: '192.168.1.12'
  username: 'youruser'
  password: 'yourpass'
  discovery: True
  discovery_retain: true
  birth_message:
    topic: letterbox/availability
    payload: online
  will_message:
    topic: letterbox/availability
    payload: offline
  on_message:
    - topic: letterbox/ota_mode
      payload: 'ON'
      then:
        - logger.log: 'OTA Mode ON - Deep sleep DISABLED'
        - deep_sleep.prevent: deep_sleep_1
    - topic: letterbox/ota_mode
      payload: 'OFF'
      then:
        - logger.log: 'OTA Mode OFF - Deep sleep ENABLED'
        - deep_sleep.enter: deep_sleep_1

ota:
Home Assistant configuration.yaml
Below are the additions to the MQTT sensor, binary_sensor and input_boolean sections of Home Assistant’s configuration.yaml file for versions of Home Assistant post 2022.6. The MQTT sensor section pulls the distance measurement off the D1 Mini via MQTT while the binary sensor turns on once the distance of the aforementioned sensor drops blow 11. We will use the data from this sensor to trigger an automation to notify us of mail delivery. The input boolean is like a switch that will force the D1 Mini to stay awake on its next scheduled wake from deep sleep. This feature is handy for OTA updates and testing.
mqtt:
  sensor:
  - name: "Letterbox Distance"
    state_topic: "letterbox/sensor/vl53l0x_distance/state"

binary_sensor:
  - platform: threshold
    name: Mail
    entity_id: sensor.letterbox_distance
    lower: 0.11

input_boolean:
  letterbox_ota_mode:
    name: Letterbox OTA Mode
    initial: off
    icon: mdi:bed
Home Assistant automations.yaml
Below are letterbox parts from my Automations.yaml file which are pretty self-explanatory, the first two bits are for the “stay awake” OTA mode while the 3rd part is for our notification automation that is triggered by the above binary_sensor threshold value.
- id: letterbox_ota_on
  alias: Mailbox OTA Mode ON
  description: ''
  trigger:
  - platform: state
    entity_id: input_boolean.letterbox_ota_mode
    from: 'off'
    to: 'on'
  condition: []
  action:
  - service: mqtt.publish
    data:
      topic: letterbox/ota_mode
      payload: 'ON'
      retain: true
  mode: single

- id: letterbox_ota_off
  alias: Mailbox OTA Mode OFF
  description: ''
  trigger:
  - platform: state
    entity_id: input_boolean.letterbox_ota_mode
    from: 'on'
    to: 'off'
  condition: []
  action:
  - service: mqtt.publish
    data:
      topic: letterbox/ota_mode
      payload: 'OFF'
  - delay: 00:00:30
  - service: mqtt.publish
    data:
      topic: letterbox/ota_mode
      payload: PASS
      retain: true

- id: letterbox-notify
  alias: Letterbox Notify
  trigger:
  - entity_id: binary_sensor.mail
    platform: state
    to: 'on'
  condition:
  - condition: time
    after: 08:00:00
    before: '23:00:00'
  action:
  - service: tts.google_translate_say
    entity_id: media_player.hallway_speaker
    data:
      message: You have Mail.
      cache: true
Mounting the electronics
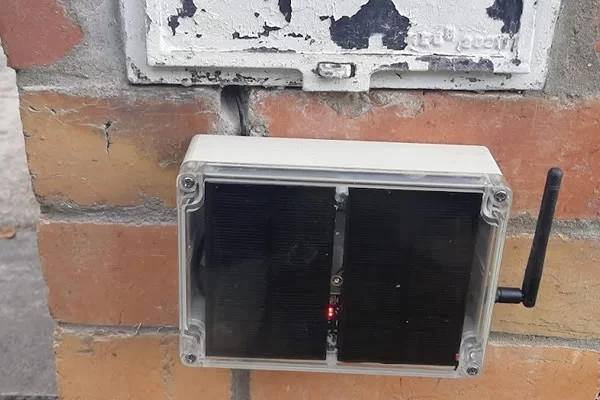
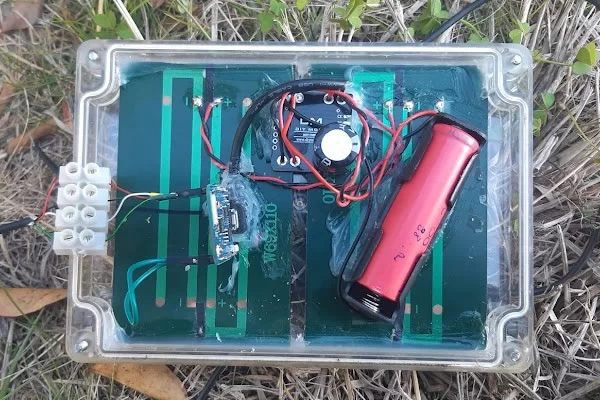
I decided to put the two solar panels, the battery charge controller and D1 mini inside a well sealed weatherproof box with a clear lid that I got from Jaycar. This weatherproof box is mounted behind my letterbox below the mail access door, and the cable to the sensor runs to a hole below the weatherproof box through to a hole I drilled in the mortar to the inside of the letterbox. The solar panels fit perfectly below the clear lid and everything is held in place with silicon. The d1 mini antenna is mounted on the side of the weatherproof box and is also well sealed with silicon.
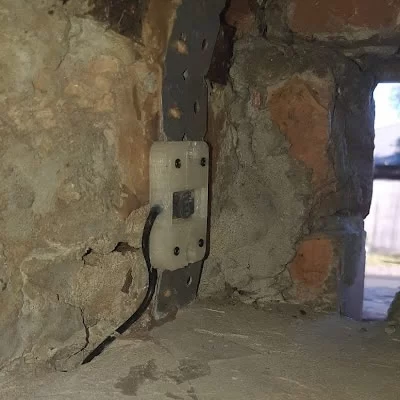
On the inside of the letterbox, I liquid nailed a bracket with two small bolts in it to the bricks on the left side of the letterbox. These bolts hold a 3D printed mount I knocked up for the VL53L0X LIDAR sensor, a bit of clear plastic from an old screw packet acts as a window for the LIDAR sensor and the two halves of the 3d print were liberally sealed with silicon before the device was mounted into the letterbox.
Wrap up
This has been a fun project that has been working reliably for over a month now. As much of this was basically trail and error prototyping with what I had lying around, if I ever come to replace the D1 mini, I would look to replace it with something a bit more power efficient. The D1 mini is designed to run off 5 volts and has a built-in regulator to power the 3.3v based ESP8266 along with a USB to serial converter, designing a circuit around a bare bones ESP8266 may use less power and allow this device to wake up at more regular intervals. An ESP32 may also be a good choice thanks to better deep sleep. All that being said, the D1 Mini has been running fine on my 18650 that measured around 4.2 volts and even ran reliability down to just above the 3v range.
Resources
My 3d printed VL53l0x mount files on thingiverse
ESPHome’s VL53lox page
Some good info on the MCP73871 charge PCB
D1 Mini Pro on BangGood
VL53L0X time of flight sensor on Aliexpress
5V 1.25W 250mA Solar panels on BangGood
example of a 18650 battery at BangGood
18650 battery holder on BangGood
MCP73871 on AliExpress
jaycar sealed polycarbonate enclosure with clear lid