I always have liked LED strip lights and if I am going to have some they have to have smart home capabilities. Philips sell such a strip with their Hue range but the price is crazily expensive where I am from. Fortunately there are a bunch of cheap controllers and led strips that are available from chinese retailers such as banggood or aliexpress that will connect to wifi and integrate with my smart home controller, Home Assistant.
The LED strip controller I purchased is sold under many names and despite having the same looking casing, the pcbs inside may have a different layout to another similar product from the same retailer. It’s worth noting that if you intend to modify the firmware on the controller some pcbs are easy to solder while other are rather difficult to solder to.
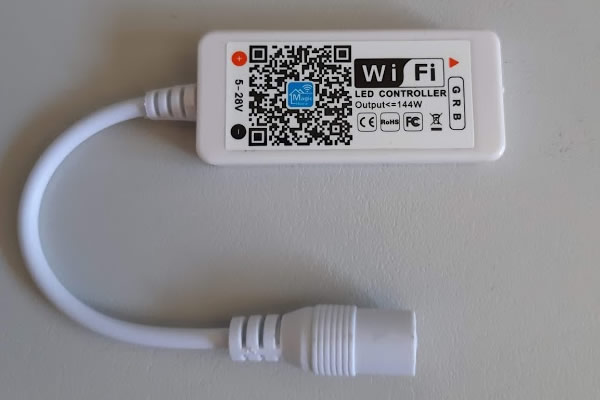
The controller I purchased and that is shown below was listed as an Arilux SL-LC 01 from banggood. It is an ESP8266 based device that runs a firmware that connects the device to your wifi via their app to allow you to control the stip via your smartphone. The app is a typical app from small Chinese tech companies that gets the job done without too many bells and whistles. If you want to connect your strip to Home Assistant without modifying the device you can by using this Home Assistant component here and still retain use of the original app. I setup two strips at a friends house like this and they work fine, although on the odd occasion Home Assistant has not picked them up first time after a reboot.
Running a Custom Firmware
Another option on using these with Home Assistant is to flash a custom firmware like Tasmota onto the device, although you will lose access to the magic home app this way, your device will be controlled locally on your network and not via a server in China. I have been running my LED strips on tasmota for almost a year now and they have been much faster to respond and more reliable. Seeing that I control them with automations and the Home Assistant app I don’t miss the magic home app.
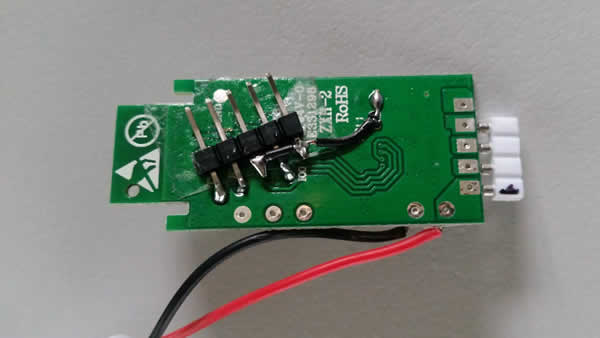
Flashing the device with Tasmota is much the same as I had previously done with my Wemos D1 Minis but an extra step of adding a header to the device so that we can connect to an FTDI programmer as the device does not have its own usb socket. We also have to short out io0 to GND when we boot the device to get it into programming mode in order to flash the Tasmota firmware. The device I purchased had all the test points in a easy to solder to spot on the bottom of the board and it was quite easy to add a header to the pcb in order to connect to the FTDI programmer and add a jumper for programming mode. You could just solder wires direct onto these test points as you will only need to flash the device like this once as further updates can be done via the tasmota interface. I had a heap of these header pins around and I found this the neatest way to connect to the FTDI programmer.
Inside the magic home / arilux controller
Opening the device is pretty easy as the case is a cheap plastic that is clipped together, there is 3 clips on either side of the device once you make a start on one end the top should pop off pretty easily . I was able to get a flat jewellers screwdriver in the side edge to pop it off. Be careful not to poke too far into the device.
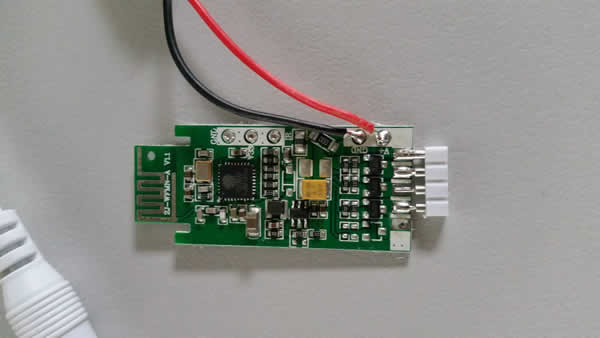
Front of the PCB.
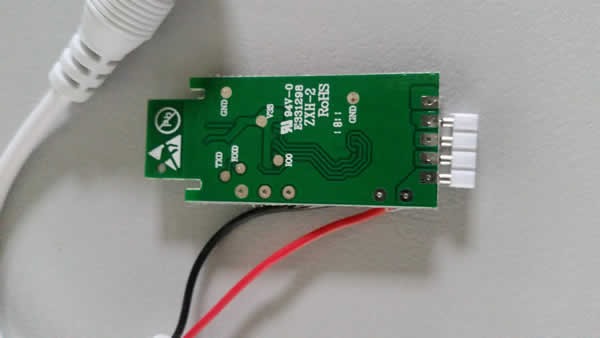
Back of the PCB, note the TX, RX, io0 and GND test points.
Rear of the PCB with programming header attached across test points.
Magic Home Controller connected to FTDI programmer.
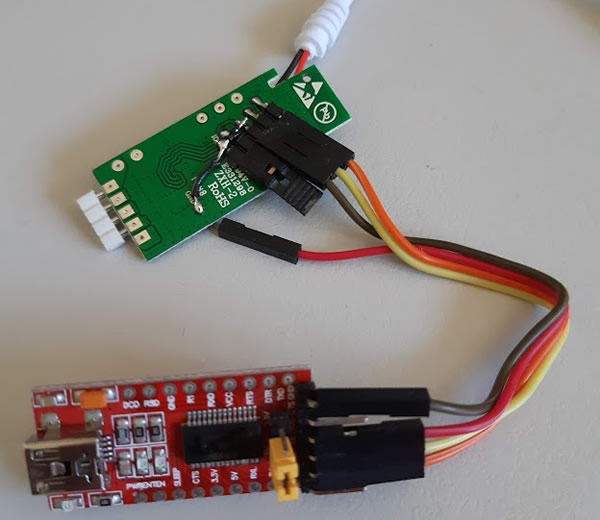
A few things to note from the above pics, firstly I have not connected vcc from the programmer as I am powering the module from its own power supply. Secondly I have added two GND pins on the new header, one to connect to the FTDI programmer and one to put a jumper on it and across to io0, this puts the device into flash mode on boot up.
The other connections of the FTDI to Magic Home PCB are as follows.
Tx → Rx
Rx → Tx
Gnd → Gnd
As I mentioned before not all of the magic home controller PCBs are the same, I also purchased a variant with a IR remote. The board on this version had no test points so I had to solder directly to the esp8266 chip, It was a rather difficult task that I would not recommend doing again.
To flash the Tasmota software to the device follow my guide here, the only difference between flashing the wemos D1 Mini and this device is adding the jumper to flash device. Don’t forget to remove the jumper once the device is flashed successfully. Once flashed configure the devices IP via termite as outline in my guide and log into the device once it is on you network.
Tasmota Setup
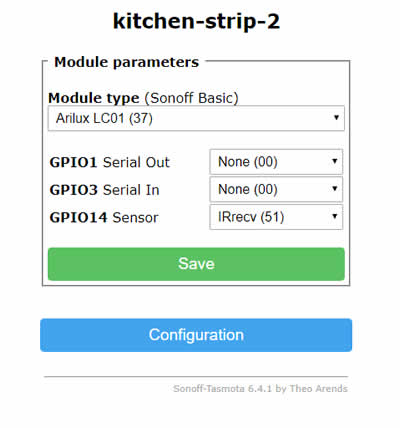
Once you are in Tasmota you can set up the device as per below. The GPIO14 setup is for the optional IR receiver some boards have that is connected to one of the 3 pads you see on the long edge of the board above. If you don’t have an IR version you can ignore this setting, you won’t be missing much as I found the IR remote pretty useless on this device and I no longer use it.
Adding the Tasmota flashed device to Home Assistant
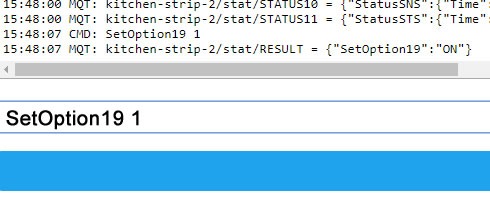
The best way to add the device to Home Assistant now days is to set up auto discovery. You do this by running the SetOption19 1 command in the Tasmota console. When logged into Tasmota on the device click on the link console and then type SetOption19 1 into the enter command box then hit enter. The console will display that SetOption19 is now on as shown below.
Now go over to your Home Assistant Configuration page and your new LED device should show up under the MQTT section of Integrations.
If you are using another Home automation platform or you are still using the old yaml method of adding devices to Home Assistant, you can find the instructions for integration on the Tasmota Wiki here.
Update August 2020
I have recently purchased a H801 LED controller that is similar to above and easier to work with. You can read my full comparison here.
Update December 2021
I just upgraded the device to the latest release of Tasmota following their upgrade path here. Everything went fine until version 10.1.0 which gave a not enough space error on uploading tasmota.bin. This can be resolved by using the tasmota-lite.bin or tasmota.bin.gz file. Note that the lite version of tasmota would drop support for the IR version of the controller.
Parts used in this project
FTDI programmer
Arilux / Magic Home LED Controller
Led Strip
Other Resources