
Got a Raspberry Pi running Home Assistant and would like to add some cheap temperature sensors to it? Well it’s pretty easy to do via several methods, Today we will focus on sensors directly connected to the pi. The below I used with Hass.io, but the same code should be usable on other versions of Home Assistant.
Raspberry Pi internal temperature
If you are looking to fill up your Home Assistant screen with a few sensors then this option is easy, and it won’t cost you a cent as no extra hardware is involved, just add the few lines below to return the pi’s processor temp. Check your config and restart home Assistant, and you should have an extra entity available that displays the Pi’s internal temperature.
sensor:
  - platform: command_line
    name: Raspberry Pi Temp
    command: "cat /sys/class/thermal/thermal_zone0/temp"
    unit_of_measurement: "°C"
    value_template: '{{ value | multiply(0.001) | round(1) }}'
Dallas One Wire Sensors DS18B20
These sensors are really cheap and really easy to use, but you will need to be handy with the soldering iron. Often called one wire sensors because they use one data line. Each sensor has a unique ID so you can connect all the data lines together and still read the value off each unique sensor. You often see them in two styles, one that looks like a transistor and another waterproof probe style (my favourite type) like pictured above.
To connect the sensor to the pi, we are going to make a header that will sit across the first five pins of the pi’s gpios as highlighted below. What we need to connect to is the 3.3v line, GPIO4 and Ground.
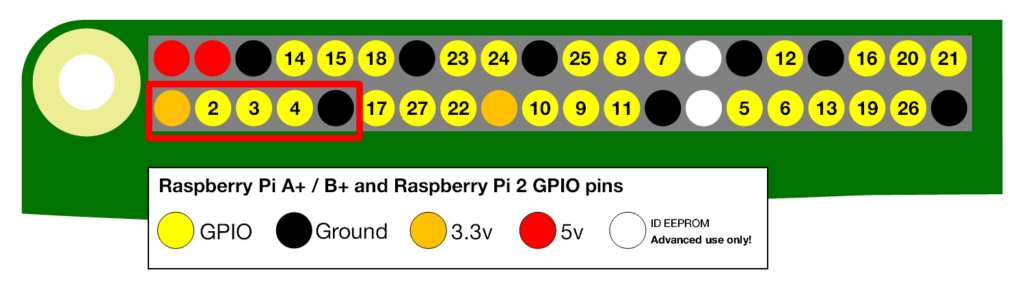
Below is a pic of the header that I made from stuff I had lying around (you get a few spares when buying lots of wemos d1 minis) and a DS18B20. The black ground wire goes to the 5th pin, the yellow data wire goes to the 4th pin and the red power wire goes to the 1st pin. It is also important to replace a resistor of around 10k ohm between power and data.

To get Home Assistant to see the sensor, you need to enable one wire on the pi. to do this, you need to edit the config.txt on boot section of the pi. The easiest way I have done this is to power down the pi, remove the SD card and edit the file on my PC with something like notepad++. You will need to add the following line to config.txt.
dtoverlay=w1-gpio
Now you can reinsert your SD card, add your sensor header (double check you place it on the header correct way) and power back up your Pi.
Now that we have hass.io up, we are still not done with getting all the info we need as we need to find out our sensor’s unique ID, something the official docs forgets to mention how to do.
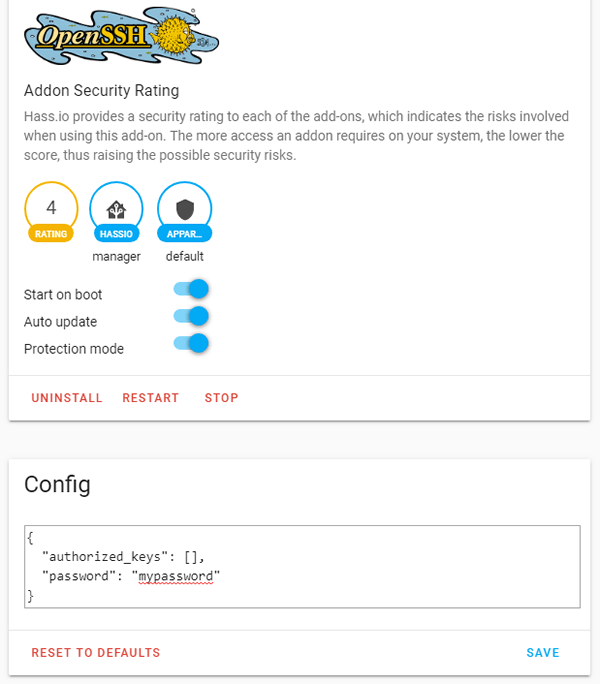
Firstly, make sure you have the SSH add-on installed on Hass.io and have an ssh program on your PC like putty.
Configure your ssh add on with a password like below.
Now open up putty and input the IP address of your pi, like below.
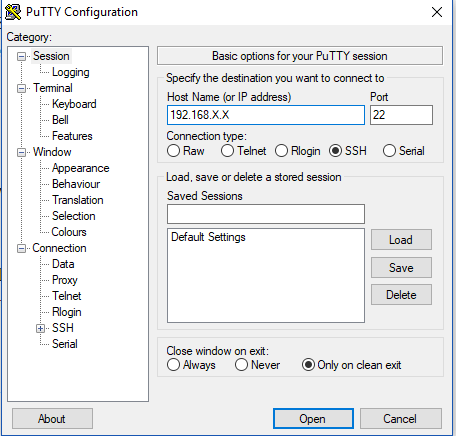
Hit open, and you will get a black logon as: page. Type in root and hit enter you will be then prompted for a password, enter the password you set up earlier in the hass.io plugin.
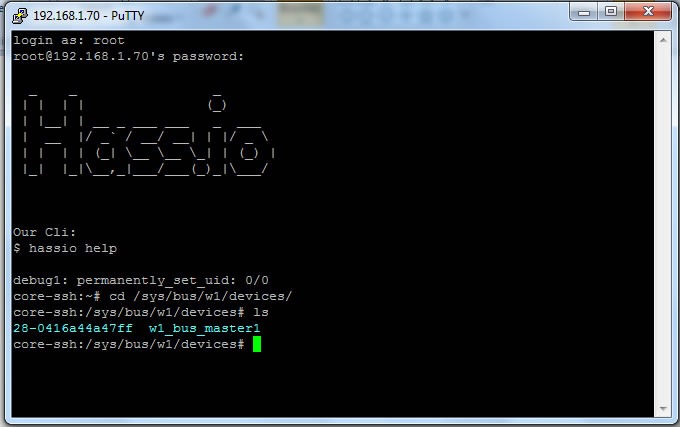
If you have done everything correctly this far, you should be presented with the hass.io txt screen, and you will be able to find out your DS18B20 ID. These sensors should show up in a directory, so we need to change to that directory and list what is there via the following commands.
cd /sys/bus/w1/devices/
ls
The ID of your sensor will pop up on the screen like below. All sensor start with 28- followed by a random hex number unique to your device. Save this ID as you will need to use it in your hass.io configuration.yaml.
Now that you have your ID add the following to your configuration.yaml swapping in your unique ID that you got earlier and your preferred name, check your config and reboot.
sensor:
 - platform: onewire
    names:
      28-0416a44a47ff: Study
Congratulations, you should now have the DS18b20 available in Home Assistant as a new entity.
UPDATE FEB 2022
The GPIO 1 wire integration is marked as due for removal from Home Assistant in version 2022.6. So this method posted above will soon no longer work.