If you have ever run Home Assistant for a while, you will understand the importance of regular backups that are kept off the system that is running Home Assistant. This is especially important for those who run their system off an SD card on a Raspberry Pi. While I have played with cloud backup plugins in the past, I have ended up removing them as I was not that happy with them. My recent backup regime results in me manually copying off the regular backups, which is a less than ideal situation. Fortunately, with the release of Home Assistant 2023.6 the option of saving your backups to a NAS drive is now an option. This new feature safely saves my Home Assistant’s backups to my NAS which is a totally separate system to my Home Assistant server. Read on to see how easy this is to set up with Home Assistant and a Synology NAS.
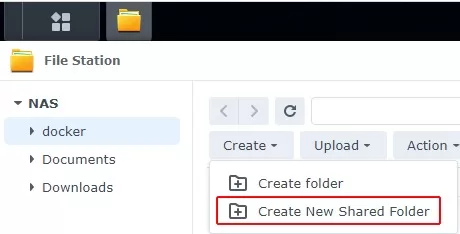
First, make sure you are using a version of Home Assistant greater than 2023.6, then head over to your Synology NAS and click on create New Shared Folder under File Station.
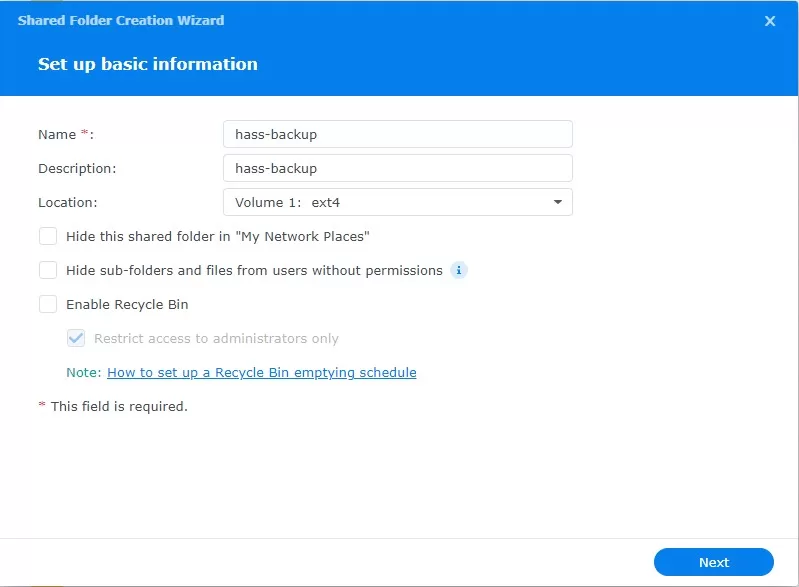
Then give your new folder a name, I have used the name “hass-backup” in my example below.
On the next screen, give yourself read and write access to the folder.

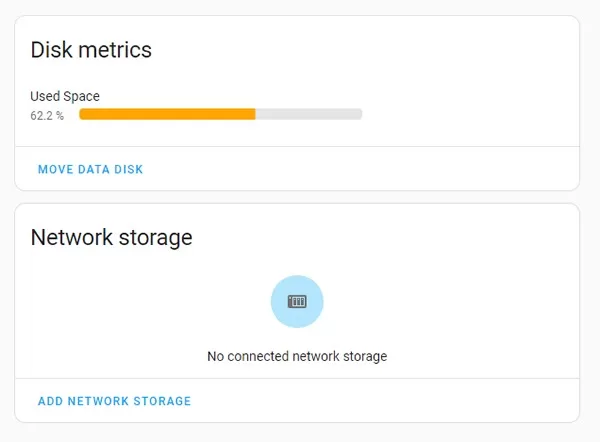
Now in Home Assistant, head over to Settings / System / Storage where you will see the below screen. Click on “add network storage”.
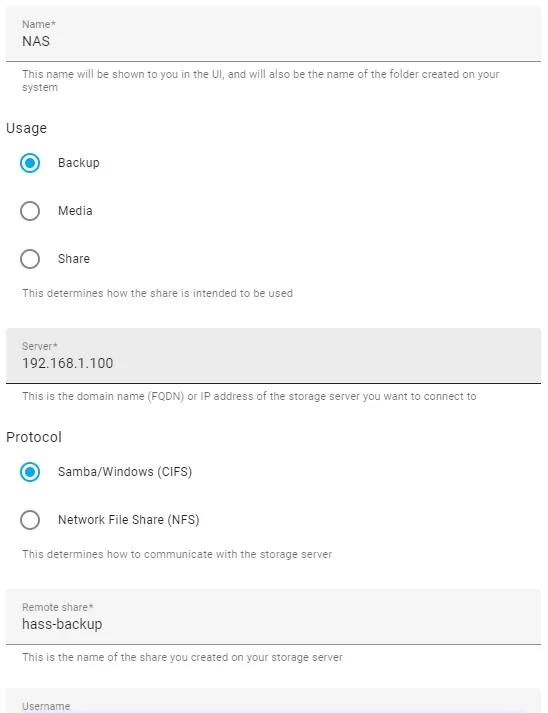
You will be presented with a screen like below.

I filled out the settings as below, where 192.168.1.100 is the IP address of my NAS and hass-backup is the folder we created earlier. You will also need to enter the username and password of the user you gave read write access to earlier.
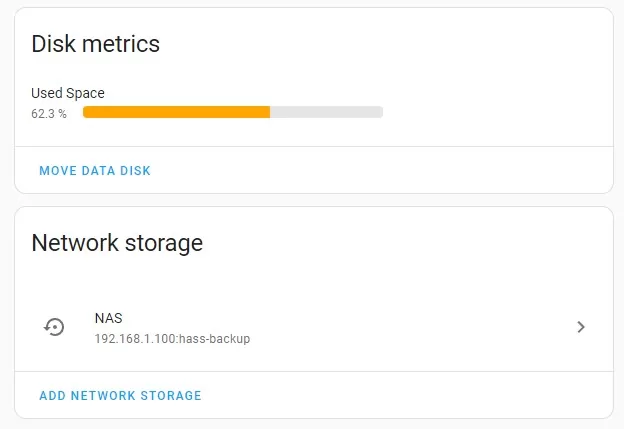
Once you have saved this form, your NAS network share will be shown on the Home Assistant storage settings page like below.
Now you can head over to backups in the Home Assistant settings page and run a manual backup. Once it’s done, check your backup folder that you created on your NAS and you will find the new backup file in a tar format. This indicates that your Home Assistant backups are now successfully saving to your Synology NAS. The process to do this on other brands of NAS should be similar to the Home Assistant side of things above, you will just need to find the link to create the shared folder on your version of NAS OS.
Home Assistant backups run each time you update to a new version, but it is also a good idea to schedule a regular backup as well. This can be done with an automation. I do one weekly in the early hours of a Sunday morning, the automation yaml code looks like below.
alias: Create Weekly Backup
trigger:
  - platform: time
    at: "02:30:00"
condition:
  - condition: time
    weekday:
      - sun
action:
  - service: hassio.backup_full
    data: {}
Wrap up
I am pretty impressed by Home Assistant’s remote storage feature, it’s especially important for keeping backups off the system you are trying to protect. Often we can get caught up with adding new cool features to our smart homes that backups can get overlooked. Any new feature that makes backing up Home Assistant safer and easier is a winner in my book.
I run my Home Assistance instance in a Virtual Machine under Proxmox, so I also backup the VM to a USB stick as a second option of redundancy. If you run your Home Assistant server the same way and want to also backup the proxmox VM to a USB, then check out my previous post here.