 If you have ever done any website development you are bound to come across WordPress. What started out as a blogging platform now powers the over 35% of the websites you may visit. While its advantages over creating sites with static html files include the vast amount of templates and plugins available there is one minor drawback when it comes to developing with it. That drawback is that if you want to make huge changes to a template or a transfer a site from static files to WordPress there maybe a downtime of your site if you are doing it all live. In the old days you could develop your new static html files locally and ftp them when you were happy to go live with your new site. Fortunately there is a way to develop with WordPress offline and that is to set up a local WAMP server on your PC.
To run WordPress on a server you need 3 bits of software that operate in the background, Apache, MySQL and PHP. This is where WAMP comes in, it is the software stack that bundles all these programs on Windows so you can set up a mini server to host your website locally on your own PC. Other systems exist like LAMP for Linux or MAMP for MacOS and you could even use this to set up other dynamic web platform like Joomla or Druple, but my guide below deals with installing WordPress on the software WampServer on a Windows 10 PC (although installing on Windows 7 should be similar).
To set up WampServer we will need a few files firstly the WampServer files themselves as well as several of Microsoft’s VC Redistributable packages. As WampServer is made up of several programs created in various versions of Microsoft’s Visual C program it is important that you install the dependency files first before installing WampServer. Fortunately the good people at WampServer have bundled all these together in one zip file that you can download here http://wampserver.aviatechno.net/.
Scroll to bottom if page under the heading “Microsoft VC packages VC2008, 2010, 2012, 2013, 2015-2019 zip files” and download either the 32 bit or 32 &64 bit zip of “All VC Redistributable Packages”, open it and install each file.
If you are installing on a 64 bit Windows install both x86 and 64 even though we are only installing the 32bit version of WampServer.
Once each file is installed you can check if you are ready to move on to WampServer install with this program below. If you missed a file go back and install it before moving onto WampServer install.
http://wampserver.aviatechno.net/files/tools/check_vcredist.exe
If the above check was OK you are now you are ready to install WampServer, download the below file and install. Even if you use 64bit Windows we are going to install the 32bit version of WampServer. You can download it below.
https://sourceforge.net/projects/wampserver/files/WampServer%203/WampServer%203.0.0/
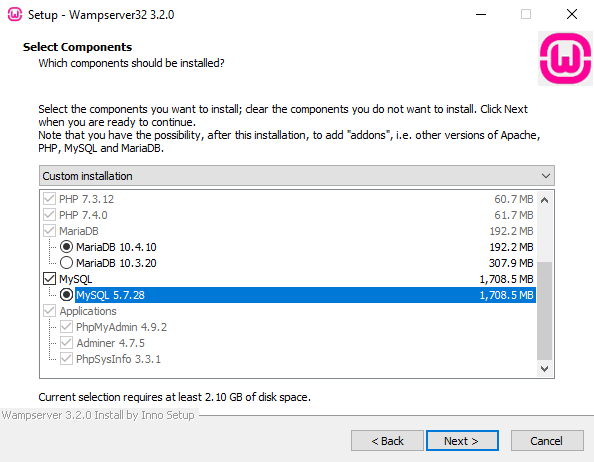
During setup make sure you select MySQL as shown below. This is the default database that WordPress uses so this will make setting up WordPress and migrating to a live site much easier.
Once installed there will be a big pink “W” WampServer icon on your desktop and a wamp directory on your C: drive. Inside this directory is a www directory and this is where you new WordPress site files will live. You will notice there already is some files in there. This is WampServer’s demo site that we will check out in a minute.
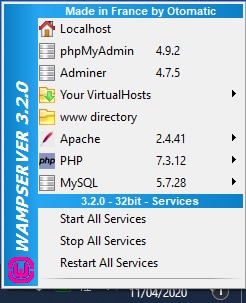
To start WampServer hit up the icon that is on the desktop and you will see a W icon appear in your system tray near the clock. if it is green everything is running OK.
![]()
When you click on it the below menu will appear, the main things you will use is the Localhost link to your Wamp website phpMyAdmin and the www directory shortcut. If you click on Localhost, the website that is contained in the www directory will display in your browser. By default, that is the Wamp demo site, but we will be replacing this with WordPress.
The default WampServer demo site (index.php of the www directory)
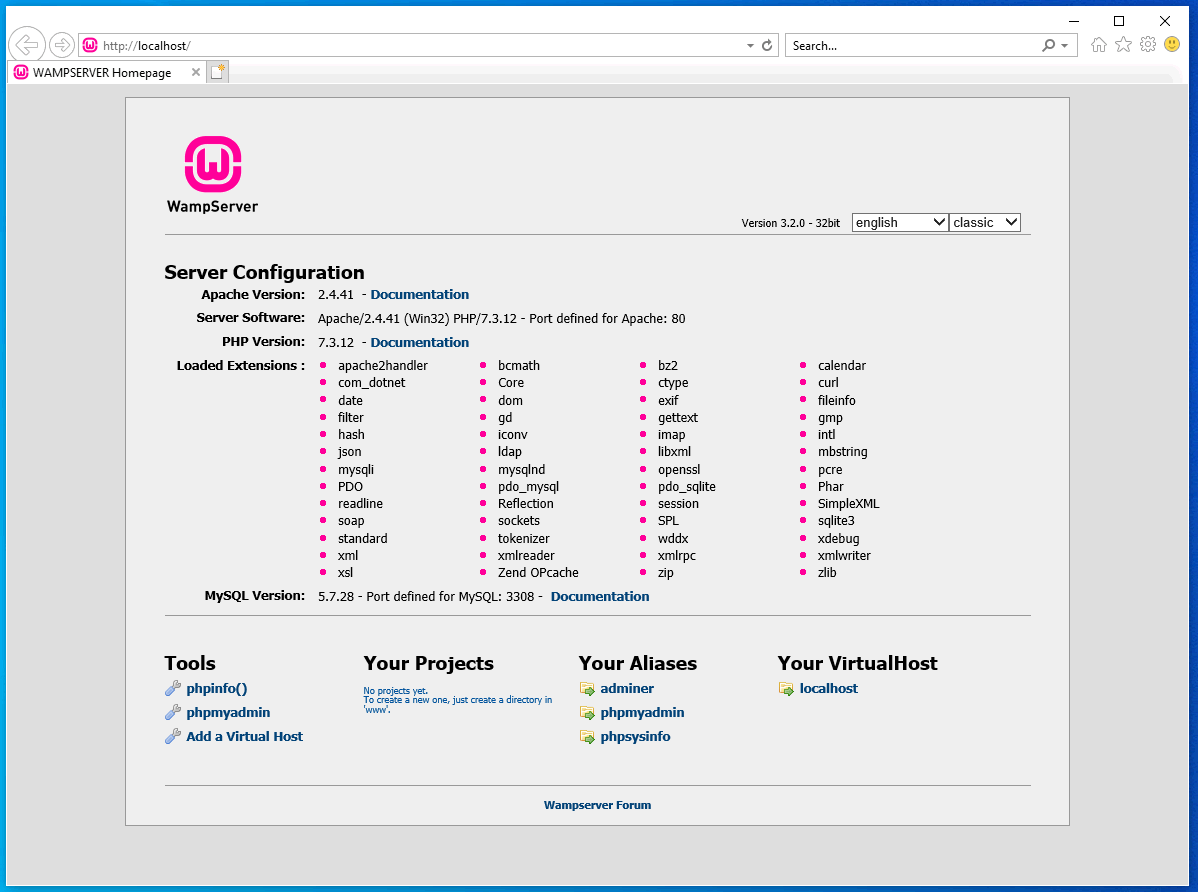
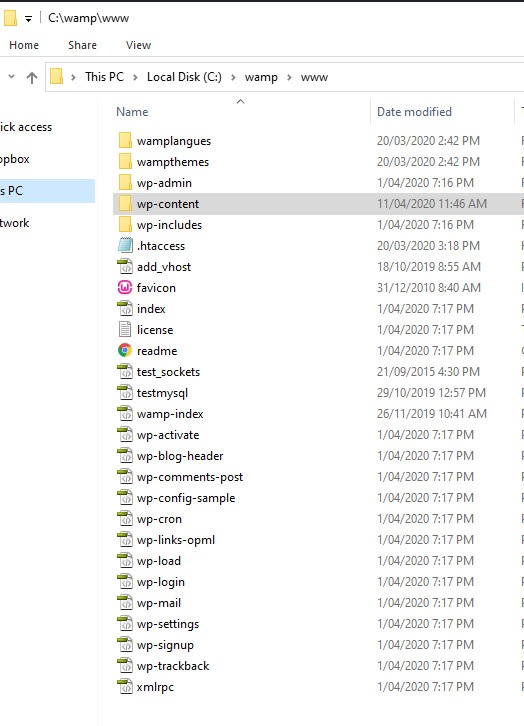
If you see the above website when visiting localhost you should be good to go on replacing this with WordPress, first download WordPress from wordpress.org and extract the files to your c:\wamp\www directory. The WordPress index.php will want to replace the demo site index.php so maybe rename this wamp-index.php or similar first. Your www dir should look like below once the wordpress files are copied into it.
Once the WordPress files are copied to the www directory you should be able to reach the standard WordPress setup screen when you refresh your browser at http://localhost. Before we can fill out any details we need to set up the WordPress database.
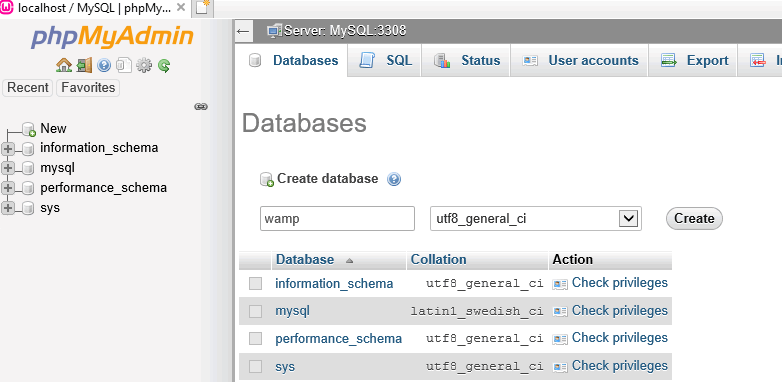
First click phpMyAdmin from the Wamp menu, the default username is root with no password. Hit go and once you are in you will see the phpMyAdmin home screen with the databases in the left column. Click on new to create a new database. In the example below we gave it the name wamp and have selected utf8_general_ci as the collation from the dropdown as this is fairly standard for WordPress. Click create to create your new database.
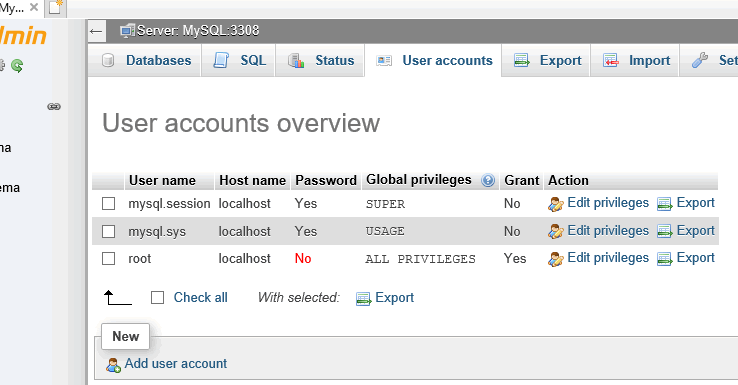
Next we need to create a user and password for the database so head to the user accounts tab and click add new user at the bottom.
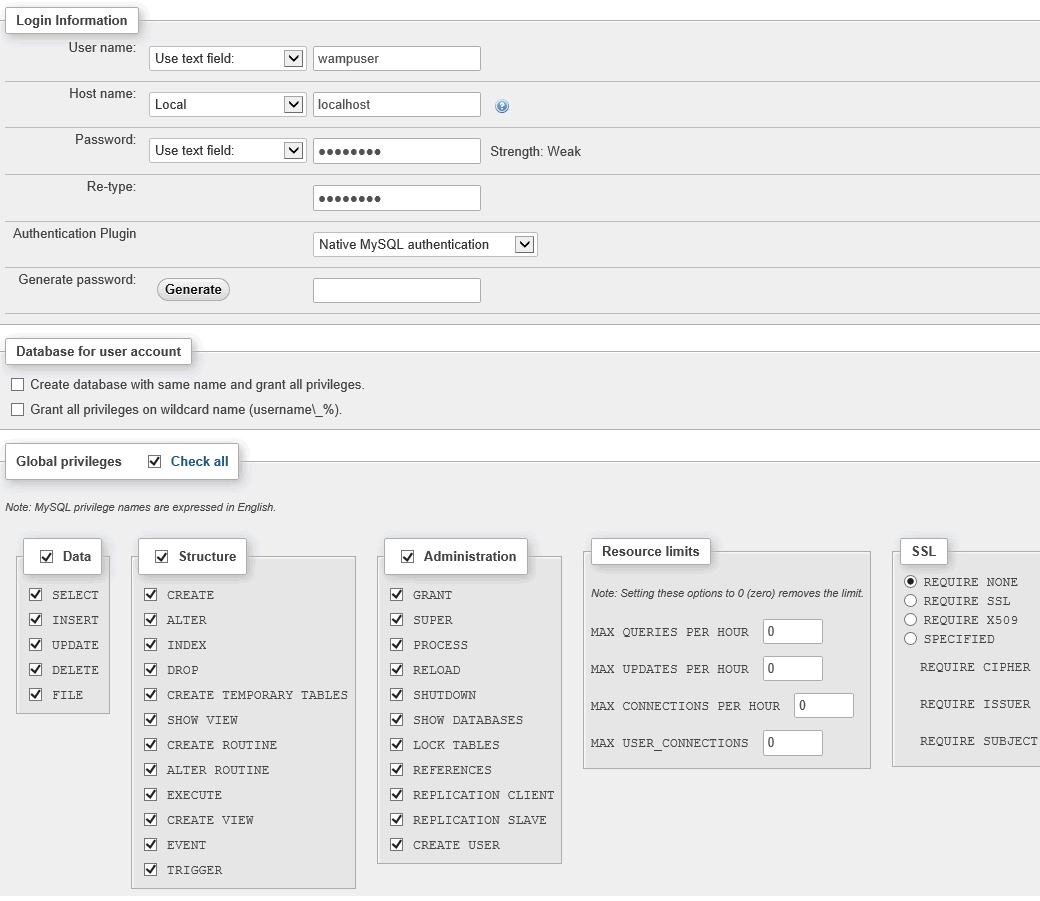
In this example I have created a user named wampuser with the password wampass I also selected global privileges as shown below.
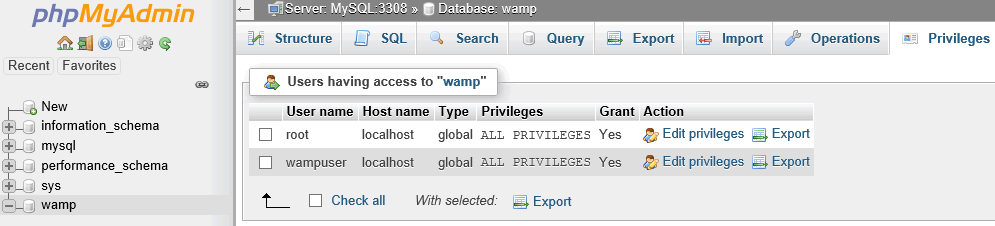
Next select your wordpress database on the left and the select the privileges tab and ensure your new user has all privileges. In my example below you can see our wampuser has all privileges to the database named wamp we set up earlier.
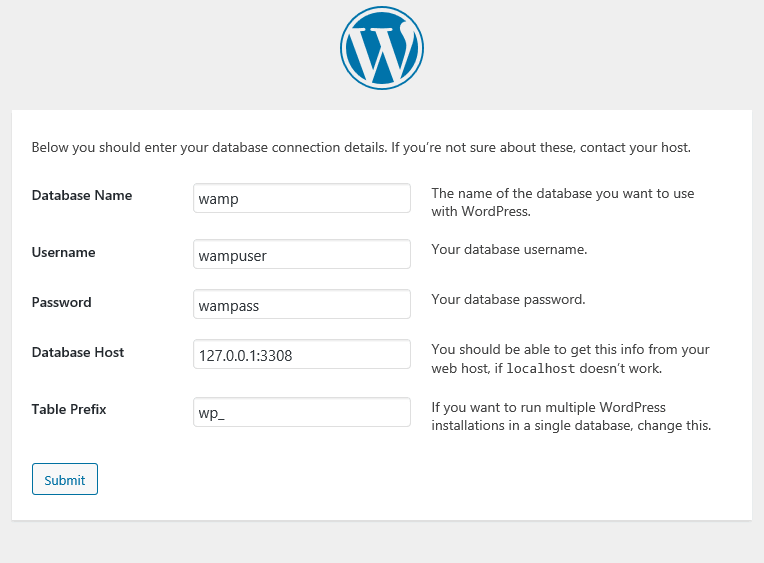
Now that we have an empty database setup with a user we can go over to our new site and set it up. Below is the setting I used based on our example database setting above.
Note that I had to put in the full path and port for the Database Host as the standard localhost didn’t work. If you want to confirm your port hover over the MySQL option from the wamp menu. You will see “port used by MySQL: xxxx” in my case this number was 3308, you may need to check if yours is different.
If all goes well WordPress will connect to the database and continue installation.
Now when you visit http://localhost you will see your local WordPress installation and you are ready to start developing off-line.
To add templates and plugins I recommend adding them directly to your wamp directory at c:\wamp\www\wp-config rather than hitting the update or install button in WordPress. I also recommend keeping a good backup if you are building your site off-line. You can use the export tab in phpMyAdmin to download the database. Also don’t forget to keep a backup of your c:\wamp\www\wp-config files.
When it comes to uploading your development site to a live site all you need to do copy over you wp-config directory if you have been only working on the template. If you have also been creating a full site off-line the backup you exported from phpMyAdmin can be used to import it into to your live sites phpMyAdmin console. I would set up a dummy fresh WordPress live site first then in phpMyAdmin drop the tables from the dummy WordPress before importing your backup.