
For a few months now, I have been trialling Frigate, a popular NVR solution most commonly used as a Home Assistant add on that provides fantastic object and person detection from your camera streams. The Frigate project is based on a Docker container, so not only does it work well as a Home Assistant OS add on, but also by itself on a separate Docker host. For a few reasons (mainly the space used by the recordings) I now plan to run Frigate outside Home Assistant on a separate Proxmox PC I have running as a development machine. To do this, I will need to get Docker running on this Proxmox PC, and I plan to do this via a TurnKey Core Linux container that I will document below.
Note that I am running Frigate without the use of a Google Coral Accelerator USB stick, which is recommended by the Frigate project. I have found performance to be fine just running the CPU detectors on two camera streams. I will probably get a Coral stick one day and will revisit setting that up then. For now, I believe the best plan of attack is to get the system running with the simplest config as possible. Also, getting Frigate running first under Home Assistant is handy to prove that part of your config works.
This post assumes you already have a working Proxmox 7 server and know your way around it a little bit, if you don’t have Proxmox installed yet, check out my previous post here. I also recommend getting Frigate working as a Home Assistant add-on first too, so you can copy over a working config and then remove it from Home Assistant once working under Docker.
Only want to play with Docker outside Home Assistant? Follow along below and skip the Frigate section.
1. Installing a Turnkey Core Linux Container
To get started, we need to install Docker on Linux, and this is best done in a container. For my setup, I am using TurnKey Core as it is lightweight and provides some nice options for maintenance via the browser based GUI.
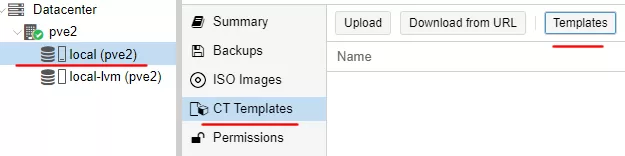
In Proxmox first click on your node, then your local storage, then CT Templates and then the Templates button.
Now in the search box, search for turnkey core and the latest lxc container for TurnKey Core will be in the list, highlight it and download.

If the TurnKey Core template DOES NOT show up, you may need to run the below command under your Proxmox node’s shell.
pveam update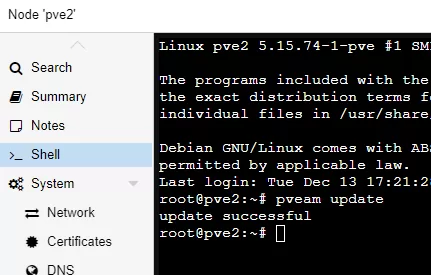
Go back and search again for the TurnKey Core template now that you have run this update.
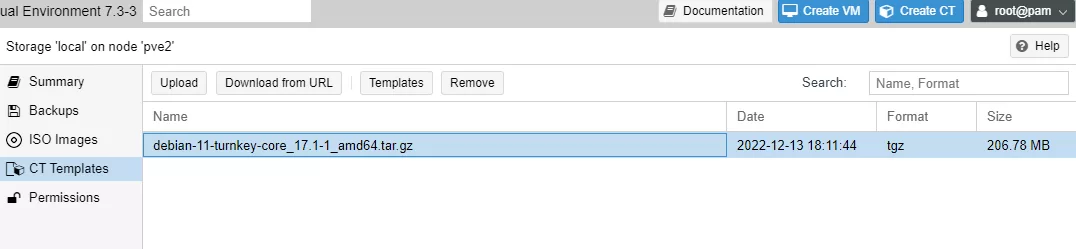
Once that is done, you will now have the TurnKey Core template in your template list like below. You can now click on Create CT on the top right of the Proxmox screen.
On the General Tab, create a password that you won’t forget, then click next.

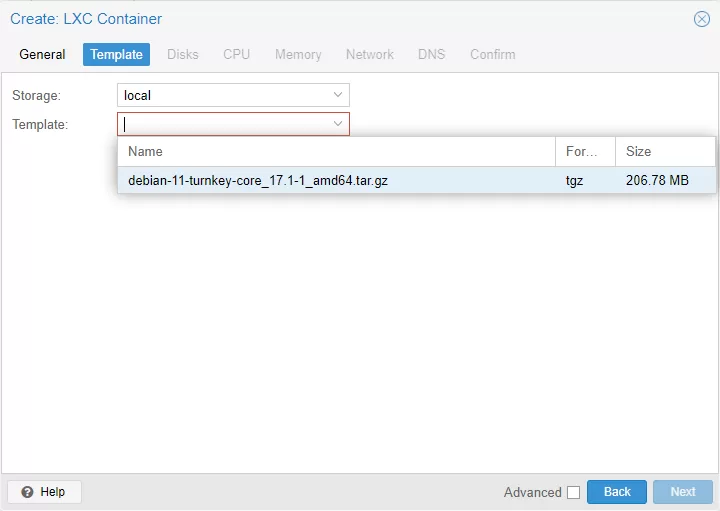
Now on the Templates Tab, select the TurnKey Core template we downloaded earlier and select next.
On the next few tabs, you get to select what resources you want to allocate to this container. I went with 4 CPUs, 6gb of memory, 512mb swap and a 30gb disk size. All this is up to you and will also be dependent on what hardware your Proxmox host has available. Note that you can always bump this up later under the resources menu of your new container.
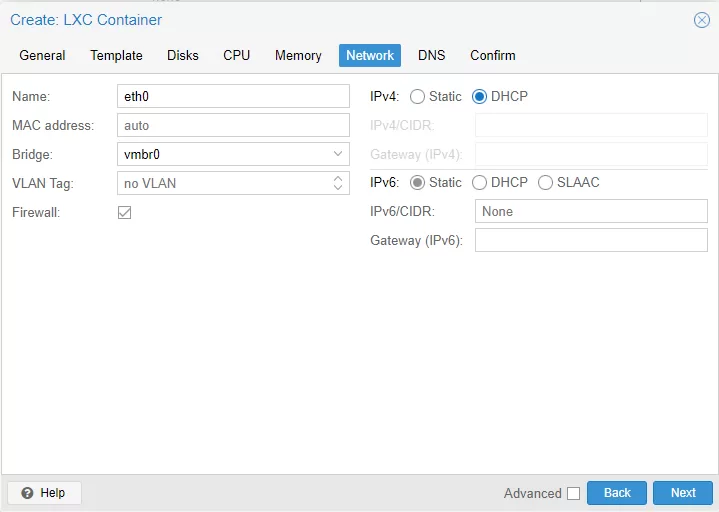
On the Network Tab I switched IPv4 to DHCP (which I will reserve the assigned IP later in my router). You may want to do the same or specify a known free IP address on your network here.
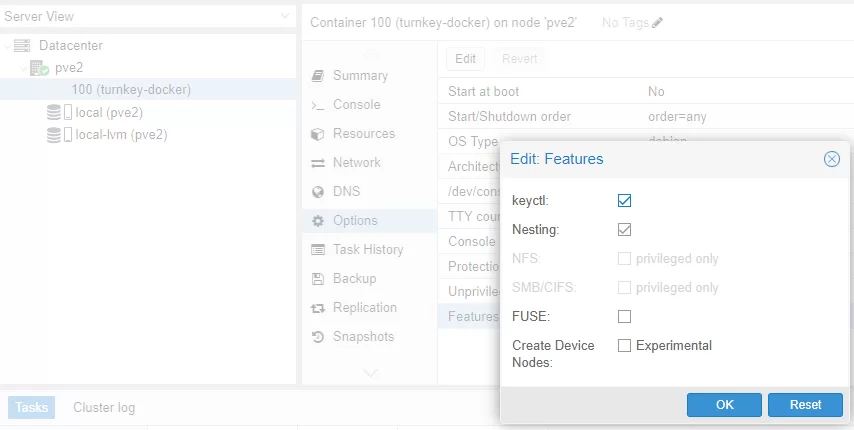
For the DNS Tab, I left it as default and then clicked Finish on the Confirm Tab. Once this is done, you will see your new TurnKey Core container under your Node in Proxmox. Before we start it, Click on it then options and then features and make sure the keyctl and Nesting options are enabled as below and click OK
2. Setting up TurnKey Core and Docker
Now, you can right-click on your TurnKey container and select start. Once it starts, click on the Console Tab to complete the Turnkey setup. The user is root and the password is what you created earlier. I skipped the API key section and answered yes to everything until I got to this page below. Make sure you take note of the IP address’s listed here and save and test them out in your browser. Webmin is especially handy to check on your system and navigate the file system via a GUI (we will do this later).
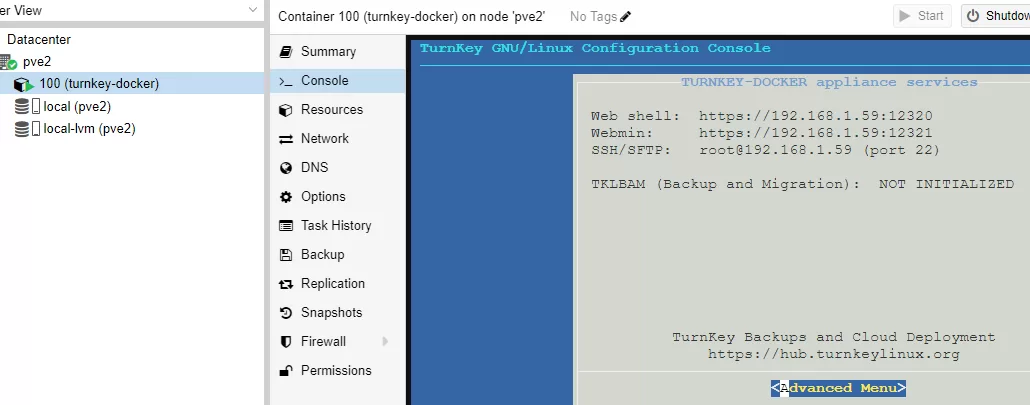
Once you have noted down the details above, click on the Advance Menu and select Quit to exit the setup wizard.
You should now be at the Command Prompt in the Console, so let’s start with some updates with the following commands.
apt-get updateNow run this command, I answered Y to any questions and selected any default prompts.
apt-get upgradeNow it’s time to install Docker with the following command
curl -fsSL https://get.docker.com -o get-docker.sh
sh get-docker.sh
Once the above finishes, you can test Docker by running this command
docker run hello-worldA message will be displayed on screen to tell you the installation is working correctly.
Now Docker is installed, let’s install a few other things that we may need in the future, the first is Docker Compose via the below command.
apt install docker-compose The next is Portainer, this Docker Program makes configuring and checking your Docker system a breeze via its GUI. Paste the below command completely at the command prompt and wait for it to finish.
docker run -d \
--name="portainer" \
--restart on-failure \
-p 9000:9000 \
-p 8000:8000 \
-v /var/run/docker.sock:/var/run/docker.sock \
-v portainer_data:/data \
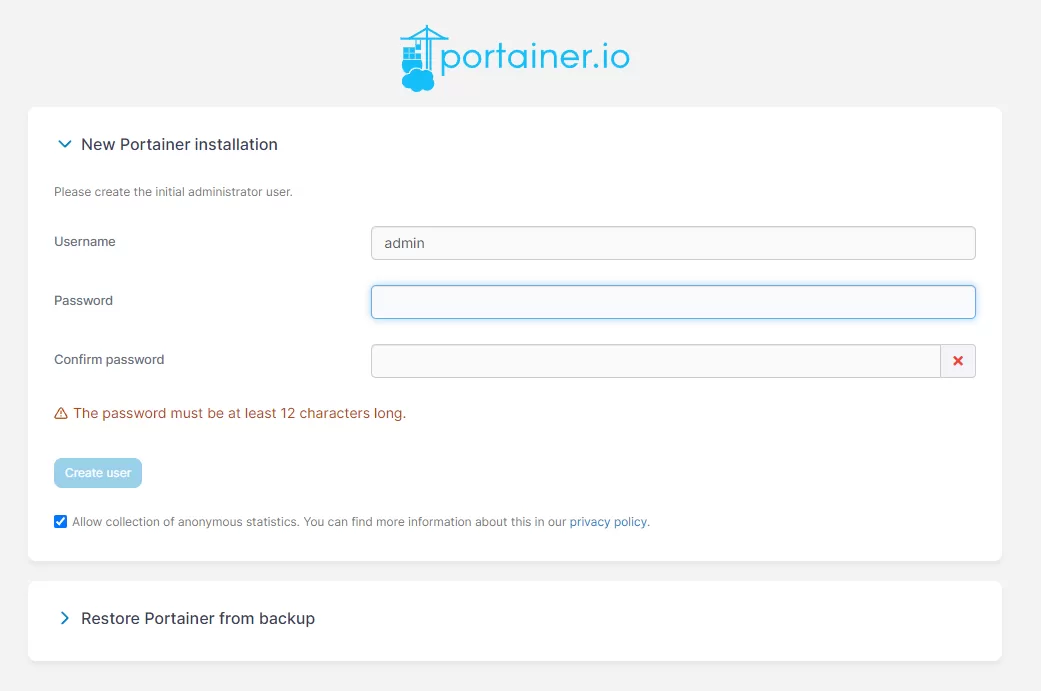
portainer/portainer-ce:latestNow we can open up another browser tab and head over to the Portainer GUI, the address is the same as your TurnKey container but ending in :9000. In my example this is 192.168.1.59:9000
If all went well, you should be greeted with the below new installation screen, create a new password and note it down.
Once in Portainer, navigate around and check out the Containers List. Here you will see Portainer itself and the hello world test we ran earlier, here is where you will see all future Docker containers like Frigate once installed, feel free to delete the hello world container.

We now have installed Docker running in TurnKey Linux under Proxmox with management via a web based GUI.
Keep on reading if you want to install Frigate in Docker as our next container.
3. Installing Frigate
As I mentioned earlier, this post recommends you get a basic Frigate install working as the Home Assistant add on first to ensure all your settings like your MQTT settings, camera streams and CPU detectors are working. Then you can copy over your working frigate.yml config file to your TurnKey Linux container and be sure you are not fighting any previous issue. I would also start off with CPU detectors to prove that Frigate runs and starts. I don’t own a Google Coral device yet, so I have not tested with passing through the Coral detector, there is some discussion on how to do it on the Frigate GitHub page here. If you have success with getting Coral working, let us know in the comments below.
The first step is to copy over your config file from the Frigate add on. In Home Assistant, it lives in the config directory and is named frigate.yml. In turnkey core, we will be placing this file in the root/frigate/ directory. The easiest way to do this is via the TurnKey Webmin file manager, as shown below. (Note that we will be naming this file config.yml instead of the Home Assistant default frigate.yml)
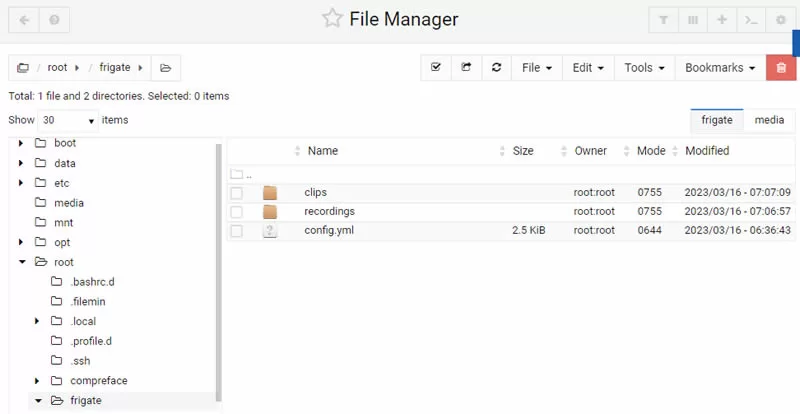
If you didn’t save the details earlier, Webmin is available port :12321 of your TurnKey IP (in my example https://192.168.1.59:12321). Ensure you create the required folders and upload the config.yml as all lower case. Everything you need is under the File menu on the top right.
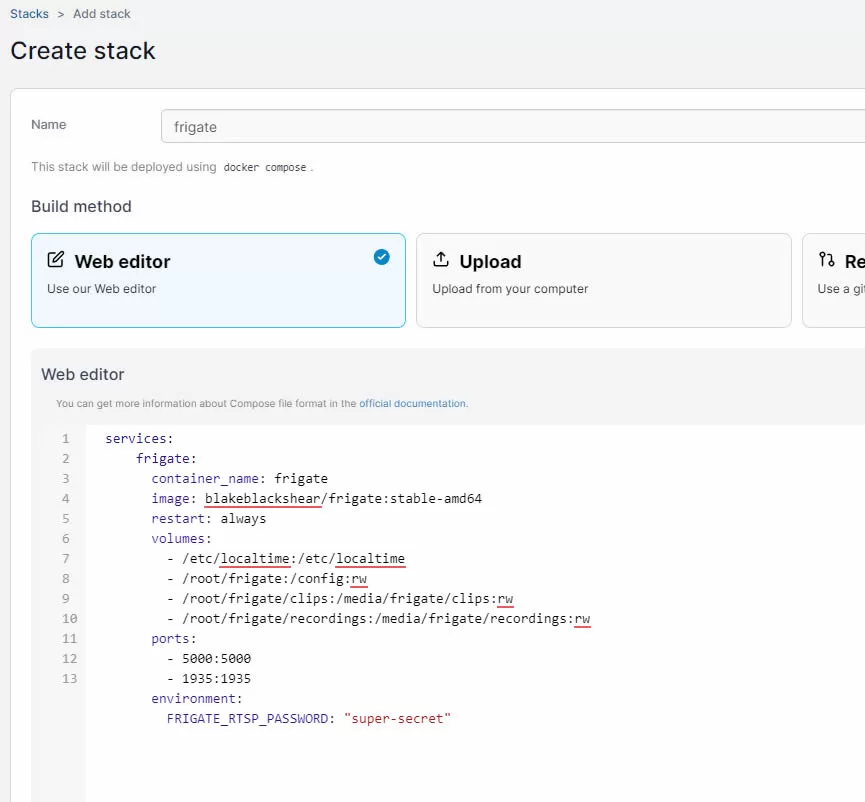
Once that is done, head on back over to Portainer and click on stacks and then click Add stack in the top RH corner. A page like below will open up where you will paste the below Frigate docker compose instructions. Be sure to edit the Frigate RTSP password.
services:
    frigate:
      container_name: frigate
      image: blakeblackshear/frigate:stable-amd64
      restart: always
      volumes:
        - /etc/localtime:/etc/localtime
        - /root/frigate:/config:rw
        - /root/frigate/clips:/media/frigate/clips:rw
        - /root/frigate/recordings:/media/frigate/recordings:rw
      ports:
        - 5000:5000
        - 1935:1935
      environment:
        FRIGATE_RTSP_PASSWORD: "super-secret"
Once that is done and the stack is named, hit deploy and the Docker image will download and create your container.
Now head over to your list of containers in Portainer and click on your new Frigate container, then click on logs. Here you will see the output of the Frigate logs similar to what you would see in the Home Assistant Frigate add on logs, if you see messages like “Camera process starting” or “Starting detector process” you will know that Frigate is running, and you can now head over to its interface on your TurnKey IP port :5000 (i.e. http://192.168.1.53:5000 in my example).
Explaining the volume paths
If this is your first time poking with Docker and Linux, the volumes part of the script may be confusing, so let break it down below.
volumes:
        - /etc/localtime:/etc/localtime
        - /root/frigate:/config:rw
        - /root/frigate/clips:/media/frigate/clips:rw
        - /root/frigate/recordings:/media/frigate/recordings:rw
Each line passes a directory through to the docker container. The first line is basically just setting the timezone on our Frigate container and will be the same for every setup, so you should leave that as is. The next 3 lines are where you want your files outside the docker container. The parts shown in bold before the colon corresponds to the path on my Turnkey Linux install. The most important one of these is /root/frigate . This is where my config.yml file lives, note that I made this read write with the :rw command (future frigate versions will allow editing the config via the ui). The next two lines pass the clips and recording folders out to the root/frigate directory, which is handy but optional. I prefer to have frigates settings and recordings located in the /root/frigate directory as it’s easy to get to, you may prefer to locate this elsewhere, if so edit the bold bits above with your desired path.
Wrap up
Congratulations, you now have Frigate running in Docker outside of Home Assistant the easy way. The next steps are all done in Home Assistant and that will be to uninstall your original Frigate Home Assistant add on, update the Frigate integration to point to your new Frigate server (you may have to delete the integration and re add it here) as well as install the Frigate Proxy add on that allows Frigate to work seamlessly inside your Home Assistant dashboard despite being installed on another server.
As stated earlier, this is just the basics to get Frigate running on a separate PC to your Home Assistant install. There are a lot of other options you can test out listed at the official docs here. While the Home Assistant add on is much easier to get up and running, I decided that performance wise, this installation was the way to go for me. If I ever get a Google Coral I will update this post in the future, if you get one before me and use these instructions to get started let us know in the comments below on how you went. Also comment below on any other Home Automation uses of Docker you are running based on a Turnkey core docker setup running under Proxmox like above.
Resources
https://docs.frigate.video/
https://www.inspectmygadgets.com/set-up-a-home-assistant-vm-on-proxmox/
Update 1/4/23
Check out my follow up review of Frigate beta 0.12
https://www.inspectmygadgets.com/install-and-review-of-frigate-beta-0-12/