In a lot of my IOT projects I have been using the ESP8266 microcontroller, more specifically the Wemos D1 mini version of this board. While flicking over the pages of the banggood website I found the ESP8266’s big brother the ESP32 on sale in a version that was compatible with the Wemos D1 mini Shields so I instantly added to my cart without much thought on what I would us it for.
Overview
The big differences with the ESPp32 is that it has faster Wi-Fi, a dual core CPU running at 160MHz compared to 80MHz of the ESP8266 along with more GPIOs and built in Bluetooth. While all this sounds like a no brainer to rush out and buy an ESP32, keep in mind that the older ESP8266 is more than capable in many sensing applications and there are many more pre-written ESP8266 projects out there than there are for the ESP32.
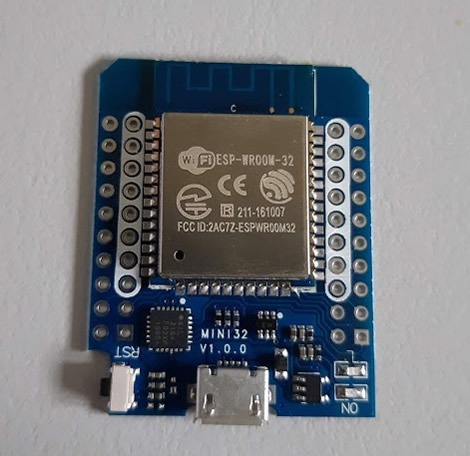
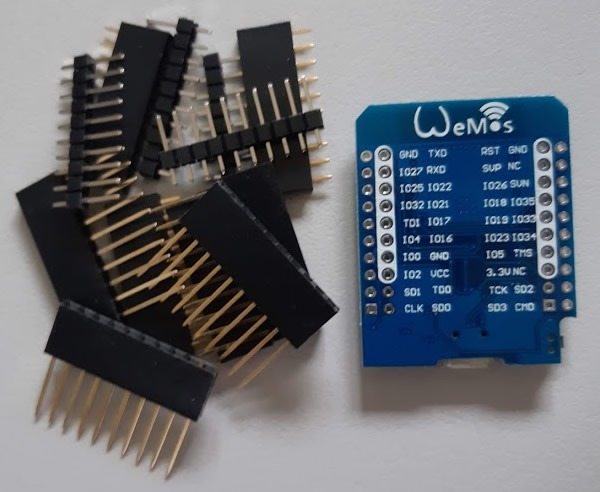
The pcb module itself turnt up pretty quickly from banggood and I immediately opened up the bag to check it out. Interestingly the device had a Wemos logo on it and the word mini32 but when you visit the Wemos website, there is no product info about it at all. On further investigation the same type of board shows up on the web as a MH-ET Live Minikit with full specifications and pinouts shown at the url below.
http://forum.mhetlive.com/topic/8/mh-et-live-m
So it seems that these boards may have no affiliation with Wemos apart from the fact that they use a layout that is compatible with the D1 mini shields. It’s also possible the device I received is a knockoff of the MH-ET Live Minikit board. I don’t think there are too many issues with this as both boards contain the ESP-WROOM-32 chip. I also programmed my board ok via the Arduino ide as a MH-ET Live ESP32 Minikit.
Review
Board Layout
While the PCB was designed to use the Wemos D1 Mini shields it was never designed to be used in a prototype breadboard. The double row design does not allow for testing in a protoboard so this may be an issue for some people. Also the pin layout seems all over the place, it’s ok once you get use to it and this is most likely done to retain some compatibility to the wemos shields.
Programming and usage
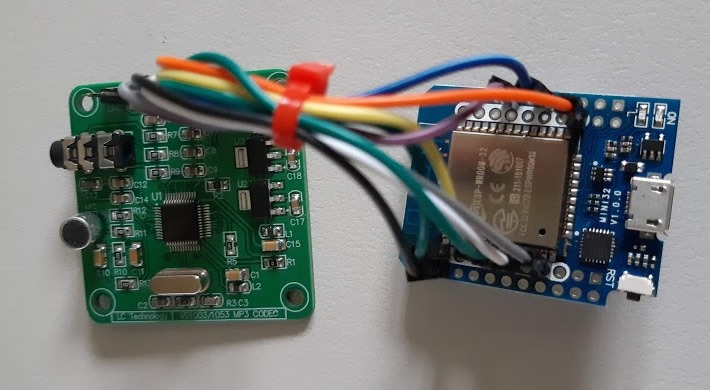
I’ve only tested out two projects on this board ESPHome for bluetooth presence detection and this excellent ESP32 Radio project here. Programming was rather easy thanks to the boards built in USB interface and I had the most success with the ESP32 radio project which seem like the perfect type of project to take advantage of the ESP32’s extra power. The interface and switching between stations is very snappy. This project was uploaded via the Arduino ide using the instructions on the ESP32 radio github page while the ESPHome project was uploaded via ESPHome’s Hassio plugin on Home Assistant. The intention with the ESPHome project was to use the device as a bluetooth presence sensor to Home Assistant. It worked ok to some extent but the device has to switch from wifi to bluetooth regularly to transfer the data to Home Assistant and this was not the result I was after, this is a limitation of the ESP32 itself and not the device we are reviewing here.
Pictured, the ESP32 connected to a MP3 board as part of the ESP32 Radio Project.
Wrap up
The MH-ET Live Minikit or Geekcreit D1 Mini ESP32 (or whatever it is labeled) is an ok board, The size is great but the pinout layout might be a dealbreaker for some. I think I will still use ESP8266 for many of my projects but when I need the extra power of the ESP32 I may shop around to find another of the many variants of ESP32.
Product link