 If you have ever played with DIY home automation before, chances are you may have come across MQTT. MQTT is a protocol that many home automation systems use to communicate with is, as it is fast and lightweight.
To use MQTT, you need a MQTT Broker on your network for all your devices to talk to (think of the broker as the chat app for IOT devices). My home automation system (Home Assistant) has a MQTT broker add on available that works quite well, but recently I decided to move the broker off my Home Assistant Raspberry Pi and onto my Synology NAS. The Synology also has a popular broker available known as Mosquitto, but it took me some time to figure out how to secure it with a username and password. After a bit of research, I have successfully moved my MQTT broker over to my NAS, which I have documented below.
Part 1. Install the SynoCommunity Mosquitto broker
Let’s start by installing and testing the default SynoCommunity MQTT Broker.
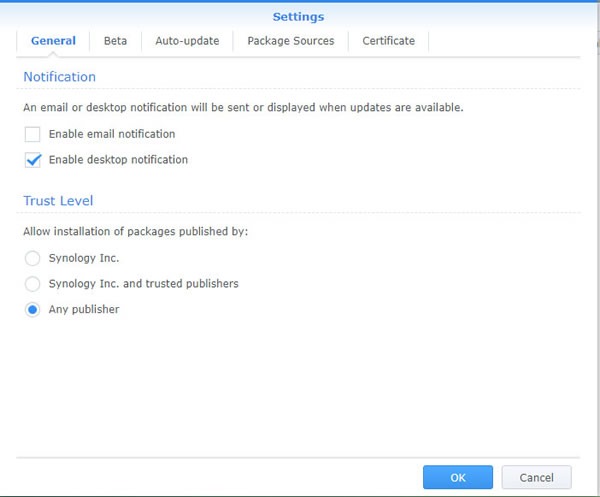
In Package Centre Set trust level to “any publisher”
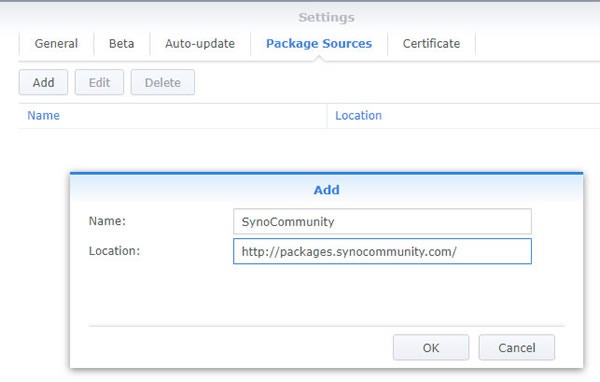
Add SynoCommunity as a source http://packages.synocommunity.com
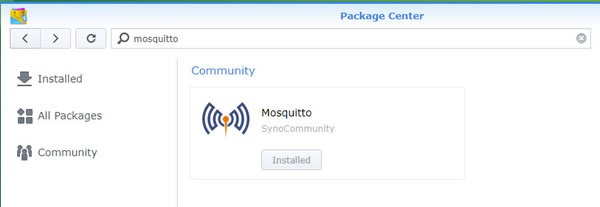
Search for and install Mosquitto. Once installed, click on it again and select start.
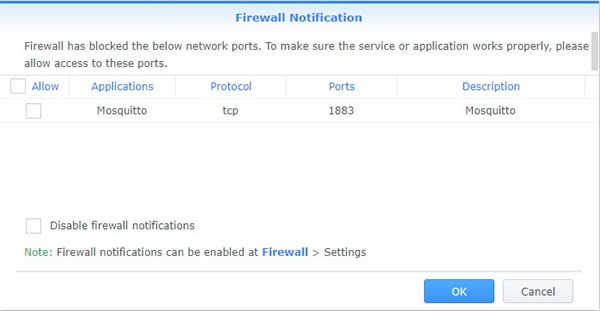
If you get this firewall popup, I would uncheck the box to turn off the firewall for mosquitto.
Testing the Broker
Before we go any further, let’s test the default broker that is installed without any user and password.
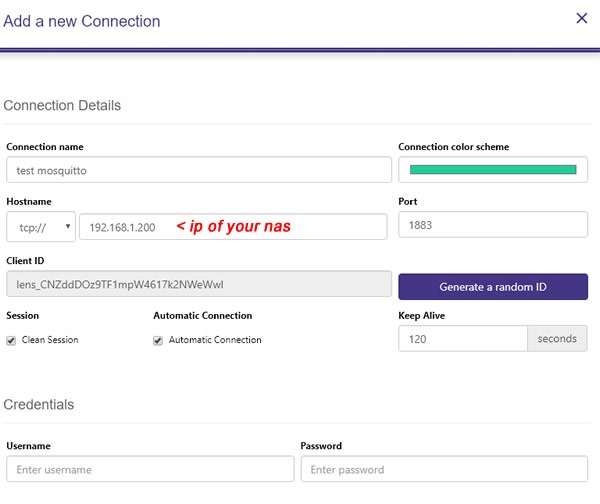
I use MQTTlens which is a small chrome based app that lets you subscribe to your broker and see the data that going to your devices. Once you install MQTTlens, add a new connection and fill out the ip address of your Synology NAS while leaving the user and password blank like below. The other settings you can leave as default and you can name it anything you like.
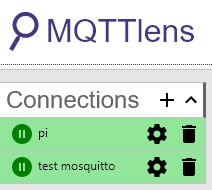
Once you hit “save changes” you should see your new connection on the MQTTlens home screen with a green circle and a pause button in it like below. This means that MQTTlens has successfully connected to your new broker.
Testing Further
Now that we have a connection to the broker, let’s test out one of our devices by connecting it to the broker and watch its data show up in MQTTlens. I am going to configure one of my Tasmota devices to connect to my new broker to test this out.
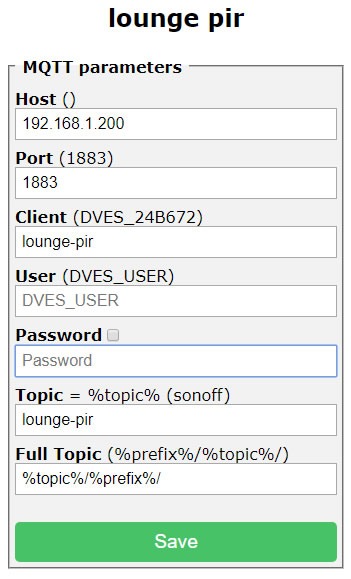
Login to your device, you want to connect to your new broker and update the MQTT settings to point to your new broker. In my example below I am using a Tasmota device, note that the default user and password is greyed out. I have deleted these settings for test purposes.
Once your device restarts, subscribe to all topics by adding a # to the subscribe field, and you should see data from your device showing up in MQTT Lens as shown below. If you are using a Tasmota based device, you will also see similar successful results show up on the Tasmota console page.

Congratulations, you have a working MQTT broker talking to your MQTT base device, now it’s time to secure your system by adding a user and password to your broker.
Part 2. Adding a user and password
UPDATE OCT 23: There have been some changes with the Mosquitto package recently. Jump over to this updated post if you are running the latest version, rather than following the instructions below.
It’s best to secure your broker with a username and password, unfortunately we are going to need to get our hands dirty with the Linux terminal to your NAS to do this as there is no simple GUI way to add a user and password to the SynoCommunity MQTT broker. Fortunately, there are not too many commands to get what we want done.
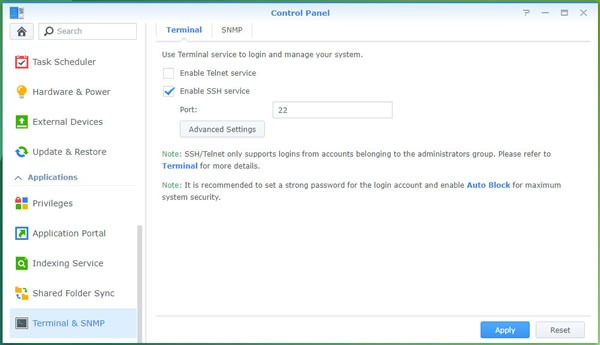
First, we need to enable the SSH terminal from The Synology control panel
Now we will download putty and connect to your NAS. Add the IP address of your NAS in the “Host Name” box of putty, then click open (all other settings can remain as default).
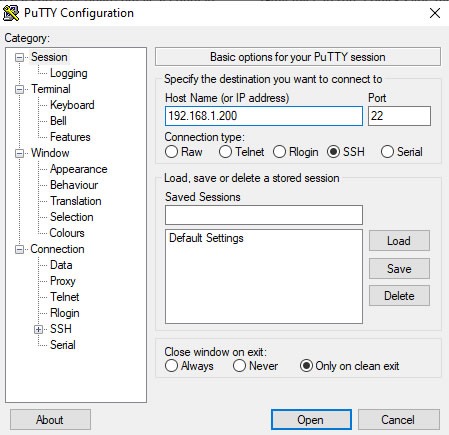
If a security warning comes up, click ok and then type your NAS username and password in the terminal window when prompted.
if you have successfully logged in, you will be at a linux prompt that looks like yourusername@NASNAME:~$
NOTE: The following commands in the boxes below can be copied and then pasted into putty by clicking the right mouse button on the putty window once the command is copied to the clipboard.
Now switch to the root user
sudo -i
Set up a password file
(paste below as all one line with one space between the -c and /var/..)
/var/packages/mosquitto/target/bin/mosquitto_passwd -c /var/packages/mosquitto/target/var/password.txt user
You will be asked twice for your desired password, make sure you keep both the same.
Now change to mosquitto config dir
cd /var/packages/mosquitto/target/var/
If you do a dir command on the directory, you should see your password.txt file. If you want to check it, type vi password.txt, and you will see your username followed by a colon, then a string of characters which is your encrypted password.
Now to set up mosquitto to use your password file
vi mosquitto.conf
- You’re now in the Vi Text editor looking at the mosquitto config file (Vi is not the most friendly of editors, but fortunately we don’t need to change too much, there are some useful vi commands near the bottom of this page). Scroll down until you hit line 513 (you will see the line number near the bottom right of the terminal). Delete the # at the start of the allow_anonymous line and change the word true to false (the i or insert key will allow you to enter text edit mode).
- Now scroll down to line 555, remove the # again and change the password_file line to read
password_file /var/packages/mosquitto/target/var/password.txt
now save and quit the file by hitting Esc followed by : then wq followed by enter.
You will have to restart Mosquitto for the change to take effect. I did this by restarting the Synology add on Package or the NAS itself.
Don’t forget to disable SSH once you are finished using it.
For final testing follow my testing instructions from earlier, but this time add your new MQTT user and pass to both your device and MQTTlens and you should see data come streaming from your device again.
If all is fine, you can now migrate all your devices over to your new broker and then connect it to your Home Automation system (don’t forget, each device needs a unique client ID). If there are issues with the connection since adding the password, double-check your mosquitto config file has saved the password_file location line and maybe try restarting your NAS.
If you are using Home Assistant, delete any built in broker from your configuration.yaml or integration page. If you are using the Hass.io add on, delete that too. Restart Home Assistant and add the new broker via configuration / Integrations menu, here you will be adding the IP of your NAS and the MQTT user and password we just set up. Home Assistant should then find your MQTT based devices.
Useful vi Commands
quit vi with no changes: hit Esc then : (colon) then type q! then enter
quit vi saving changes: hit Esc then : (colon) then type wq then enter
adding text: hit the insert or I key to get into insert mode and hit Esc when done
delete a character: place the cursor on where you want to delete and hit Delete or X to delete the character
Resources
Synocommunity Mosquitto plugin
https://github.com/SynoCommunity/spksrc/wiki/FAQ-Mosquitto
Putty
https://www.putty.org/
MQTTLens
https://chrome.google.com/webstore/detail/mqttlens/hemojaaeigabkbcookmlgmdigohjobjm?hl=en