With a lot of talk around air purifiers in the news lately, I decided to purchase my own. While I often look for some smart device, I found that the range of smart air purifiers way too expensive for what I wanted to spend, so I went for two good value Ikea products that I planned to make smart via Home Assistant with a bit of hacking and a smart plug.
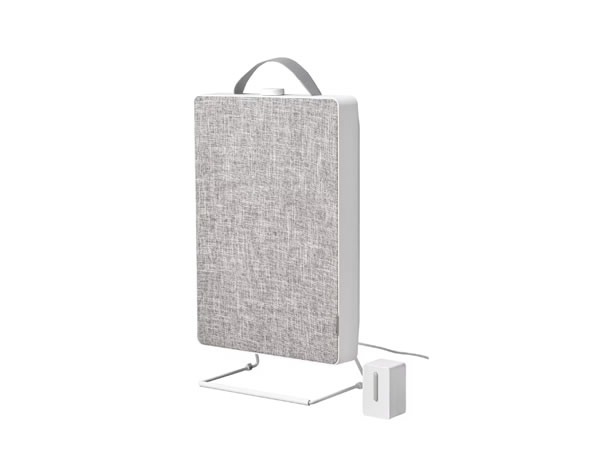
The two Ikea products I purchased were the $89AU Fornuftig air purifier and the $15AU Vindriktning air quality sensor. The air purifier is a basic device which is essentially a 3 speed fan that can filter air via a $15AU dust filter and an optional $20AU gas filter. Given it’s a pleasant looking design and reasonable value, I decided to purchase this air purifier and operate it via a smart plug connected to Home Assistant.
The air quality sensor is also a very simple and pleasant looking device. Powered by a not included USB-C cable, it has a light bar on the front that ranges from green to red. If the air quality is good the light is green, burn your sausages and the light will change through yellow to red, so you know it’s time to turn on your air purifier.
Hacking the Vindriktning Air Quality Sensor
Inside the air quality sensor is a PM2.5 dust sensor known as a PM1006, this sensor has a small fan in it that sucks air in via an IR sensor that detects the dust in the air, purchasing a sensor like this stand alone would surly cost more than the $15 that the Vindriktning retails for. Fortunately, thanks to the good people over at the open source Tasmota project, it is quite easy to add an esp8266 microcontroller to the PM1006 sensor and get the PM2.5 reading into Home Assistant. The case of the Vindriktning is also big enough to house my favourite ESP8266, the Wemos D1 Mini, without restricting air flow. I have even knocked up a 3D printed bracket to mount the D1 Mini inside the Vindriktning’s case.
The below assumes you have a Home Assistant sever running a MQTT broker. To complete this project you will need an IKEA Vindriktning, a Wemos D1 Mini, a PC to program said D1 mini, some wire and to be proficient with a soldering iron.
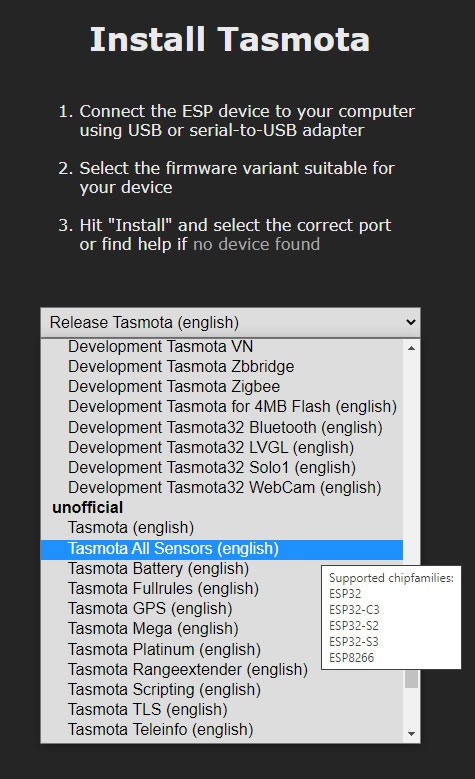
To upload Tasmota to our D1 Mini we will use the new Web Installer released in Tasmota 11.1.0. First, plug your D1 mini’s USB cable into your PC and go to this address, https://tasmota.github.io/install/ in a chrome based browser. You will see the screen below, and you will need to select the “Tasmota All Sensors” release from the unofficial release section of the drop-down. It is important to use the “All Sensors” release, as it is the release that includes support for our IKEA sensor.
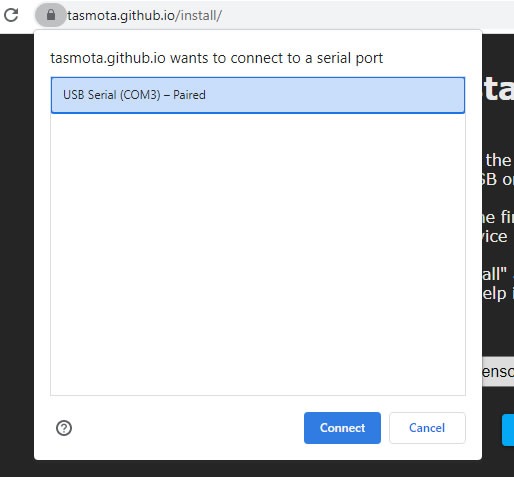
Once you hit connect, you will receive a pop-up like below listing your connected D1 Mini as a comm port. Select it and hit connect.
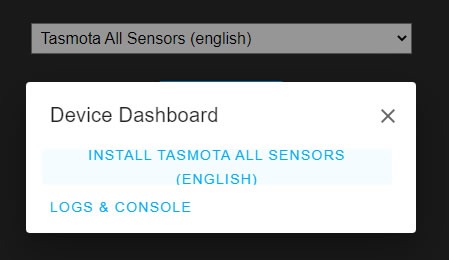
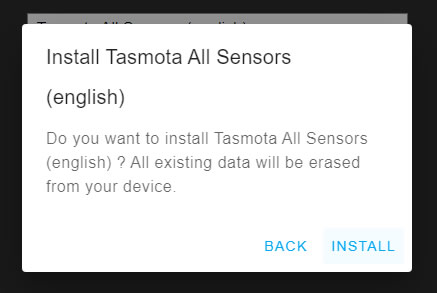
You will receive a conformation to install Tasmota to your device (ie: your D1 Mini).
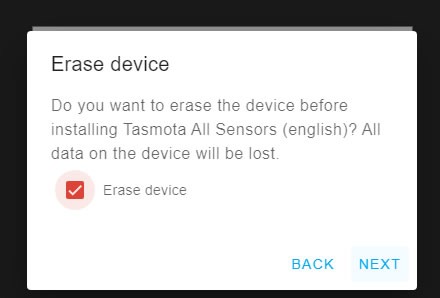
Click erase and next.
Click install.
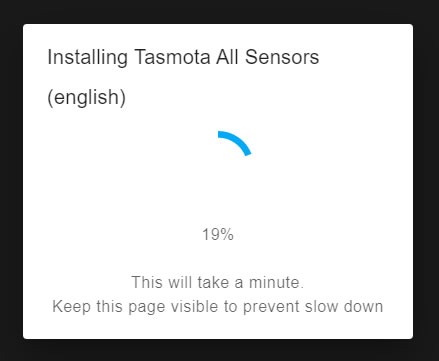
If all went ok, you should see the progress box like below. If you had issues here or don’t want to use a chrome based browser, check out my previous article on flashing Tasmota with Tasmotizer.
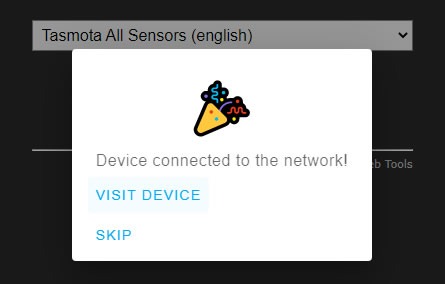
Once the device is flashed, you should get an option to add your Wi-Fi details to the device.

After the device connects to Wi-Fi, we get an option to visit its internal webpage where we can continue configuring the device. Make sure you take a note of the device’s IP address once you connect to it, in case you need to jump in there later. I also reserve the IP address in my router to make it easier to find in the future.
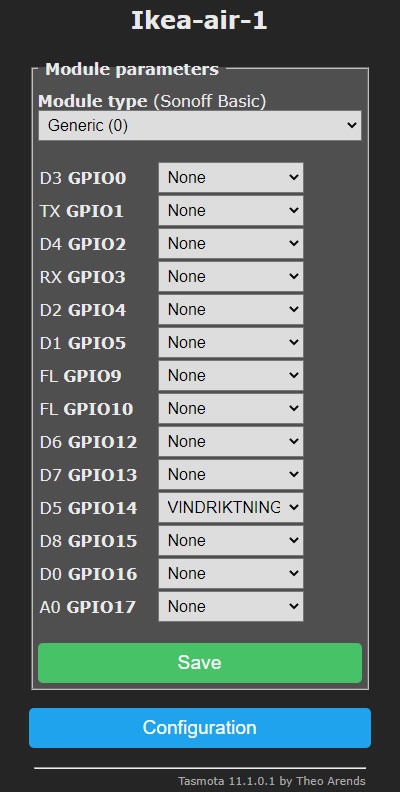
Once you are in the Tasmota interface, there are a few nice configuration options to set up like a secondary Wi-Fi access point if available, Home Assistant’s MQTT broker details and a friendly device name that can found under the “Configure Other” section. The main section we need to configure here is the “Configure Module” Menu where you will choose the “Module Type” of Generic save and select “VINDRIKTNING” from the drop-down on the pin you intend to wire the Vindriktning sensor to (in my case pin D5).
Once the above is saved, you can unplug the D1 Mini’s USB cable as the D1 Mini is now ready to solder the device into the Vindriktning housing.
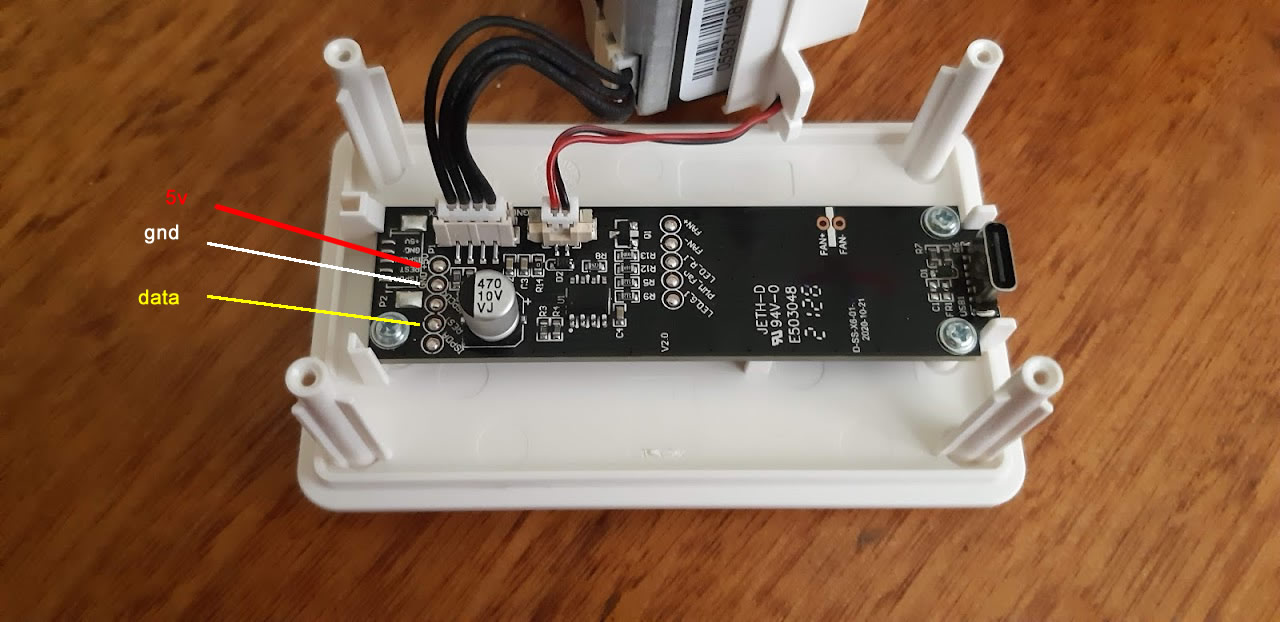
On the Vindriktning side, disassemble the case by removing the 4 Philips head screws to expose the front panel and air sensor, to make it easier to work on, slip out the air quality sensor from the rear cabinet. You can identify the required pins we need to solder to on the upper part of the PCB, marked +5v, GND and REST. +5v and GND are self-explanatory and connect to the D1 Mini’s +5v and GND pin respectively. The REST pin is our data connection that needs to connect to one of the GPIO pins of the D1 mini. I have chosen pin D5 here (also known as GPIO14), you will need to remember which pin you use in order to configure Tasmota later. The recommended pins to use would be either D1, D2, D5, D6 or D7.
Below is the Vindriktning all wired up to the D1 Mini, I ended up placing hot glue around where I soldered to the Vindriktning PCB in order to protect the joints as I reassembled the case. When it comes to soldering, I recommend a fine tipped iron and to pre tin the pads and wires, keeping them as short as possible. Due to the size of the PCBs involved, some fine soldering experience is recommended.
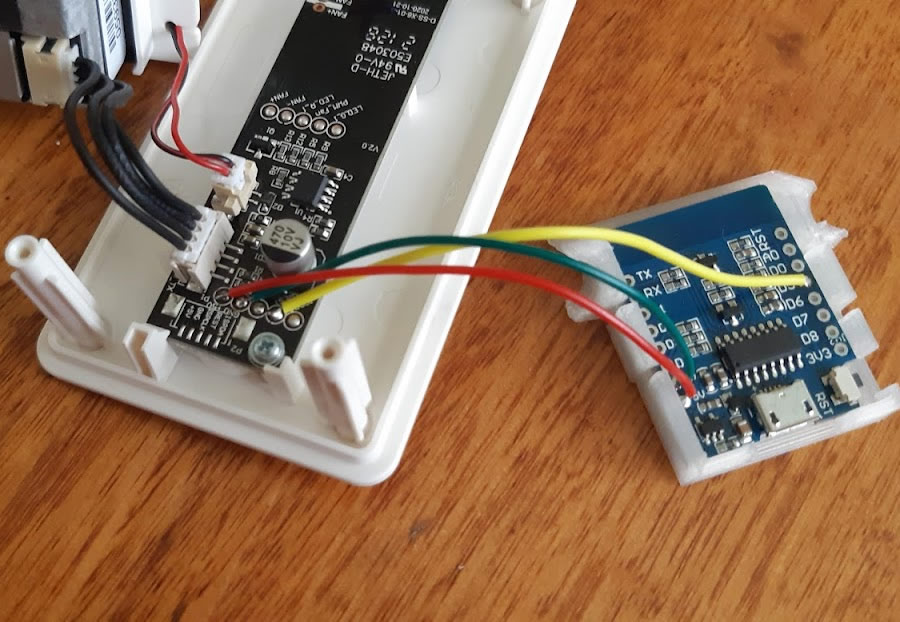
Below is the device semi assembled with my 3D printed D1 mini bracket in place. Be careful not to pinch the wires when screwing the case back together. From now on, the D1 Mini is now powered from the Vindriktning’s PCB and its own mini USB will never need to be used.

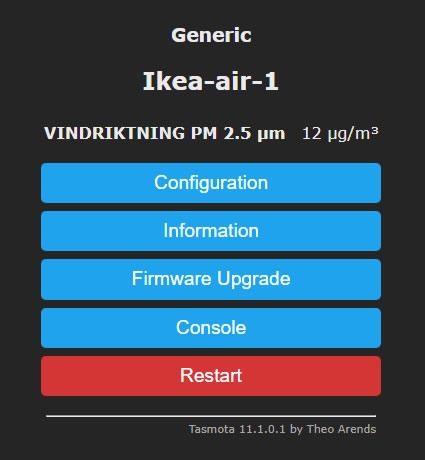
If all went well, your Tasmota device should now show PM2.5 readings like below when you head over to its interface.
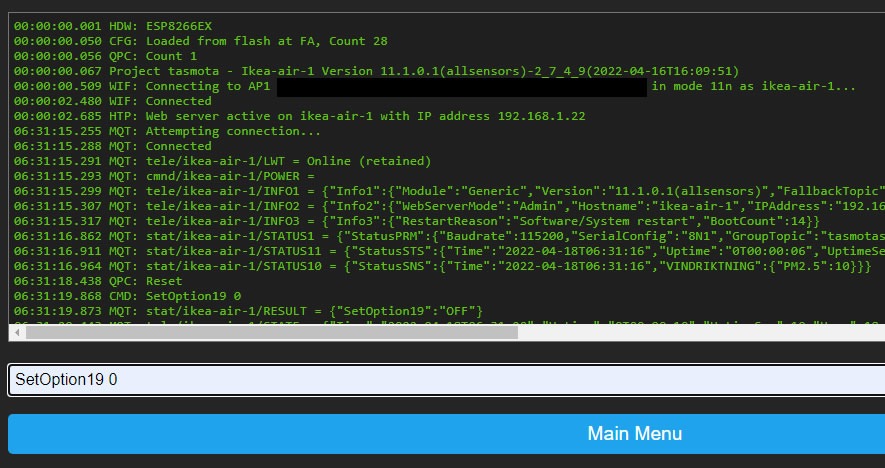
In order to get your new device properly into Home Assistant, first check the console page and look for a line like MQT: Connected. This means that the device is connected to your MQTT broker, which is the first step we need in place. Now over in Home Assistant, click “Configuration” followed by “Devices and Services”. If Tasmota is not already in your list of Integrations, click “add integration” and search for Tasmota and add it. Back over on your Tasmota console page, type SetOption19 0 like below and hit enter. This will add the device to Home Assistant’s Tasmota integration, from here you can add it to a room, create automations based on the PM2.5 level etc, all from within Home Assistant.
Wrap up
I really like both of these Ikea devices, they are nice looking and great value for money. Add a smart plug to the air purfier, pre-set a fan speed and automate a daily run in your room is a fantastic cheap way to get some smarts to the air purifier. Hacking their cheap air quality sensor to get its PM2.5 data into Home Assistant is a fun project that can make both of these work together via Home Assistant and match the performance of a much more expensive smart air purifier.
Resources
An alternate way to flash Tasmota to the D1 Mini
Tasmota unofficial builds If you are going to flash Tasmota via alternative means you will need the all-sensors build from here.
My 3D printed D1 Mini Bracket design
D1 Mini at Bang Good
Ikea Fornuftig air purifier
Ikea Vindriktning air quality sensor