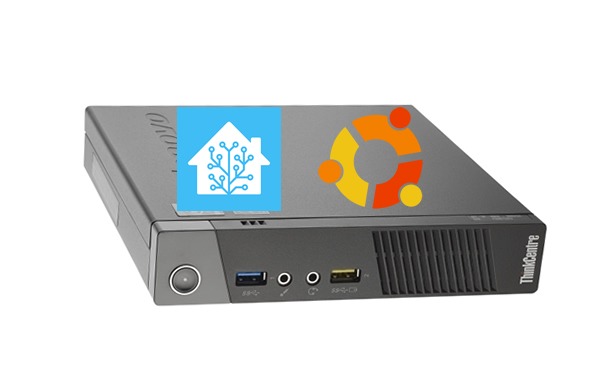
 If you have ever played with home automation at all you most likely would have come across the software Home Assistant, Think of it as a hub like Smartthings or Vera that you build yourself. The most common way to do this is with a Raspberry Pi and a SD card loaded with the Home Assistant image (previously known as the Hass.io image) and soon you will be set to start connecting to the smart devices around your home and automating them. I had been running a Raspberry Pi setup for close to 2 years until one day the SD card died on me, as I didn’t have a replacement SD card at the time I decided to temporarily get hass.io up and running on my ubuntu laptop. It ran so well I have decided to ditch the Pi altogether and run Home Assistant supervised (formally called hass.io supervised) on a mini PC. Many people do this on an Intel Nuc, I found them to be a bit pricey for what they were and decided to go with an old Lenovo M93P mini PC that I picked up off Ebay for around $250AU. This Intel i5-4570 3.0ghz PC with 8gb ram and 120gb ssd is powerful enough to run Home Assistant blazing fast along with much more other software. The benefit of using an Intel NUC over this method is that there is a Home Assistant image available for it. With my mini Lenovo PC I only have the choice of running Home Assistant Core (Home assistant without the add-ons and snapshot feature etc). Home Assistant in a VM or Home Assistant Supervised on Docker. This post deals with the later.
Once Home Assistant is up and running you can then import your previous Home Assistant snapshot and your Home Assistant setup will be fully migrated over to your new mini PC server.
Step 1 Setup PC
I downloaded the latest Ubuntu Desktop (19.10 at the time or writing) and chose minimal install, when choosing to format the disk I chose the LVM option as there is an option to easily create snapshots of the drive with LVM. The install of Ubuntu desktop is pretty self explanatory.
Many people suggest Ubuntu Server when setting up a system like this but I am choosing desktop as I plan to install a few other things later on that may require it and I prefer to use the GUI where I can. Under the hood both flavors of Ubuntu are the same.
When setting up the system create a user and password that you won’t forget.
Once Ubuntu is installed logon and open a terminal and run the below commands to check all is up to date.
sudo apt update
sudo apt upgrade
Another thing you will need later is the PC’s ip address, click on the network icon on the menu bar followed by wired connection followed by wired settings then click the gear icon in the connected box. you will see the ipv4 address here starting with 192.168… remember this address and set it permanently here in settings or reserve it in the DHCP section of your router.
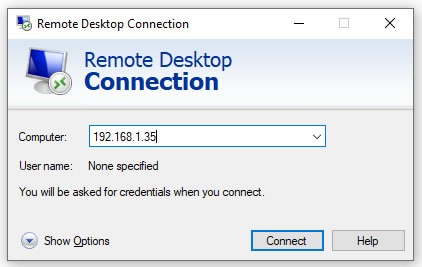
Step 2 Setup Remote Desktop
As this PC will be living in my server cabinet I don’t want to connect a monitor to it every time I want to fiddle with it. So my plan is to use the Remote Desktop Connection program that is built into Windows to connect to the Min PC’s desktop. To setup remote desktop on the Ubuntu side you will need to install xrdp so open terminal and run the following commands.
sudo apt install xrdp
sudo systemctl enable xrdp
Let’s install jq as this is required for Home Assistant and was not there by default when I was using Ubuntu 20.04.
sudo apt-get install -y jq
Note that once you unplug your monitor to put your mini PC in the cupboard, Ubuntu will see that there is no monitor connected and may give you issues remote desktoping to it. I got around this by using a dummy VGA adaptor like this one. Alternatively you could install a dummy display driver like outlined here.
Step 3 Install docker
At the time of writing docker images were not out for Ubuntu 19.10 so I had to install it via the 19.04 “disco dingo” images. Depending on when you read this there maybe a newer way to install it. What I did was based on this post and is outlined below.
Setup the key
sudo apt-get install \
    apt-transport-https \
    ca-certificates \
    curl \
    gnupg-agent \
    software-properties-common

curl -fsSL https://download.docker.com/linux/ubuntu/gpg | sudo apt-key add -
check the key
sudo apt-key fingerprint 0EBFCD88
you will get a few strings of text starting with pub rsa4096 ..
Now add the “disco dingo” repository and install docker
sudo add-apt-repository \
   "deb [arch=amd64] https://download.docker.com/linux/ubuntu \
   disco \
   stable"

sudo apt-get install docker-ce docker-ce-cli containerd.io
Once done you can verify the install with.
sudo docker version
The details of your docker install will be displayed on the screen.
Step 4 Install Home Assistant
We are going to use the Home Assistant installer to install Home Assistant. Firstly in terminal run sudo su to become the root user then run the following command to pull down the Home Assistant image and install.
curl -sL https://raw.githubusercontent.com/home-assistant/supervised-installer/master/installer.sh | bash -s -- -d /home/user/docker/hassio
Make sure you change the user above to your Ubuntu user name. This command at the end places your Home Assistant config documents in your Ubuntu user directory and will make accessing them for setup and back up easier later on.
Step 5 Setup Home Assistant
Once the above command has finished, you should be able to get to the default new Home Assistant install by visiting localhost:8123 on your Ubuntu desktop’s browser. From here, simply setup a new user and you are ready to go with Home Assistant.
Step 6 Migrating from another Home Assistant install
If you are migrating a Home Assistant install from another system, copy your snapshot file to your /home/user/docker/hassio/backup directory in Ubuntu’s file manager (alternatively, set up and use the samba add on). Then head to Home Assistant’s supervisor/ snapshot page and hit the refresh arrow on the top right. Your backup will appear on the snapshot page, and you will be able to restore from that backup image. Once the snapshot is restored, you will be able to login with your original Home Assistant user details.
I still use a manual port forwarding and let’s encrypt certificates setup and not Home Assistant’s Nabu Casa cloud on my system, so once the snapshot was up and running I had to redirect my router settings to my new Home Assistant PC. Once this was done, I could test out my new installation with my original Home Assistant https:// url.
Wrap up
That’s it for this post. I will be doing some follow up post were I setup automatic backup amongst other things. I have been running hass.io on my new mini PC for a few weeks now and previously on an old i5 laptop with 4gb of ram for over a year. While setup is a bit more poking around at the start, once you move from the Raspberry Pi you will never look back.
Update May 2020
I have just built a 2nd system for a friend using the above as a guide on Ubuntu 20.04 LTS Focal Fossa. Everything went well, I have updated one link above that had changed due to Home Assistant’s rebranding of Hass.io to Home Assistant. I have also updated the article to refer to the system formerly known as Hass.io as its new name of Home Assistant.
Update September 2021
I have moved my Home Assistant install to a VM under Proxmox on the same hardware as above and this is the way I will do any future installs from now on as the above method is officially unsupported now. Check out my new post on how to install Home Assistant under Proxmox here.