 This post is a follow on to my previous post where I installed Home Assistant OS as a virtual machine under Proxmox. I did this on my development PC to see if Proxmox was for me before I moved the VM to my main home automation server. Now that I am happy with Proxmox running Home Assistant, it’s time to upgrade my main server to Proxmox and set up Home Assistant on it. While I could have just done a fresh installation like I did in my previous post very easily, I decided to test out Proxmox’s clustering options that allow the VM to be moved to another PC in the cluster. If this option interests you, read on.
The full description of clustered computers is best described by the Wikipedia page on the subject. While clusters are often used for fail over options and for distributed computing, What I have done is simply add my two PCs (nodes in cluster speak) to a cluster in order to move the Home Assistant VM from one to the other. After I moved the VM, I removed the original test node from the cluster that I was not using anymore. In future, if I ever want to power off my main server for some time, I would simply set up a fresh Proxmox install on another PC and move the VM over to it until I was finished working on my main PC. This is probably overkill, but doing this was a great learning exercise.
Creating a Proxmox cluster
This post assumes you already have Proxmox installed on two PCs. Not sure on how to install Proxmox? See my previous post here on installing Proxmox here.
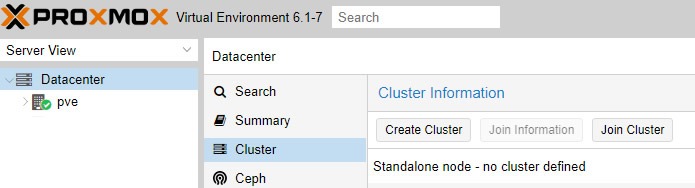
With Proxmox installed on both the old PC and the new PC where you want to move your VM to, have the interfaces to both Proxmox machines opened in your browser. Create the cluster on your main PC via the Create Cluster button under Datacentre / Cluster.
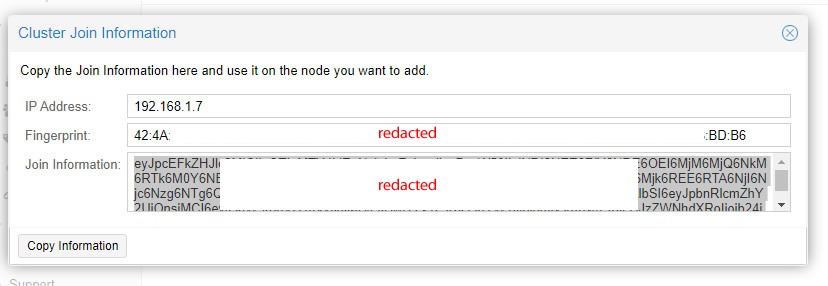
Now click the “Join Information” button, a box will pop up like below. Click the “Copy Information” button to copy the join info string to the clipboard. We will be using this info on the other Proxmox install to join in to this one.
Now on the Proxmox interface to the old PC, click on “Join Cluster” and paste in the Join Information we copied in the last step.

If all went well, you will now have both systems showing up under the one Proxmox install. Now we can go about migrating your Home Assistant virtual machine to your new system.
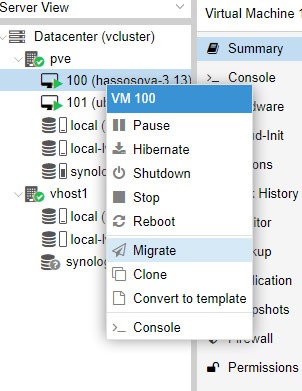
First, right-click on your Home Assistant virtual machine and click Migrate. As we only have 1 other node in our cluster (named vhost1 in my case) it will default to move to this node.
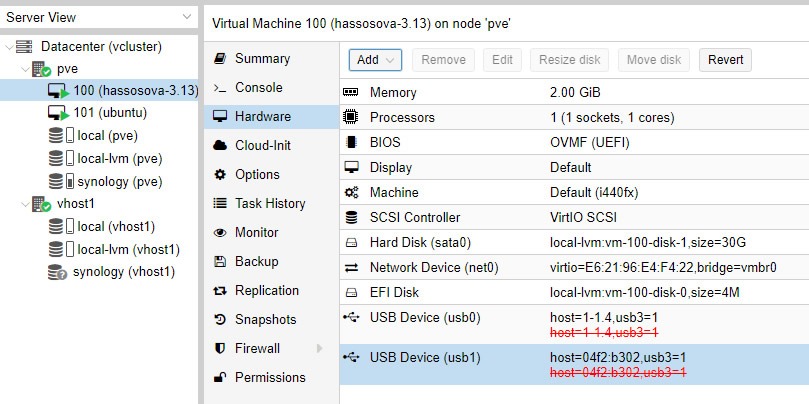
The next box will pop up to authorise the migration. It’s possible that it will complain about USB devices if you had set up any USB devices on your old hardware. If so, let’s cancel and remove them before continuing.

Select your Home Assistant VM on the left, then hardware. Physical stuff like CD ROMs and USB Devices always can’t be migrated with any VM, so we need to remove them first. Highlight the device, then click the remove button. The device will be crossed out once removed, but it won’t really be removed until you shut down and restart the VM. The shut-down button is near the top right of the Proxmox interface.
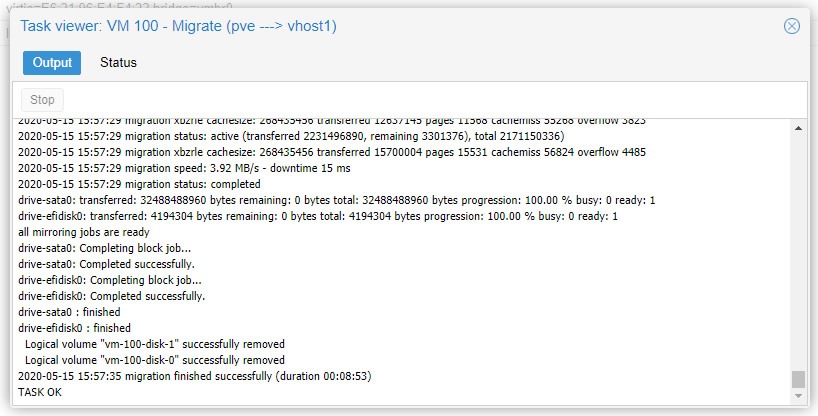
Once the VM is rebooted without the USB device, you can go back to the Migration step and start migrating your VM. Mine took just under 9 minutes to migrate. You will know when it is done when the Task viewer says TASK OK. You can close the task viewer box and check out your VM on its new node.
If you had a USB device connected to your Home Assistant, you can add it back now. First plug it in to the new PC where your VM now lives. Then in Proxmox select the VM followed by Add then select USB Device.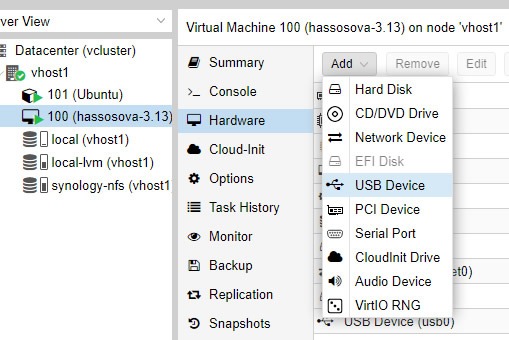
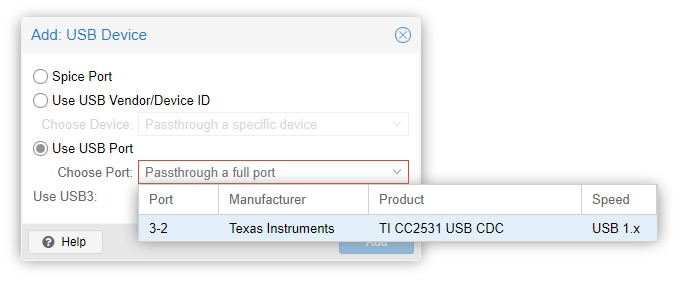
In my case, I had a Zigbee2MQTT stick plugged in, so I selected like below.
Reboot your Home Assistant VM and the USB device will be available to Home Assistant.
Remove the original node from your cluster
If, like me, you set up your first Proxmox install on temporary hardware before wanting to move it to your main hardware, you may want to remove the old hardware (referred to as a node by Proxmox) from Proxmox.
First shut down the unwanted node via the shutdown button in the Proxmox interface.
Once shutdown, ssh via putty (or similar) into your new node and run the following commands, replacing yournodename with the name of the node you are removing.
pvecm expected 1Let’s check the nodes you have on your system and their names.
pvecm nodesDelete the node.
pvecm delnode yournodenameNow move the cluster directory to hide it from the GUI.
mv /etc/pve/nodes/yournodename /root/yournodenameIf you refresh Proxmox the old node will now be gone. I would avoid using that hardware again without doing a fresh Proxmox install on it. I would imagine it would give you a lot of issues, I probably would not reuse the old node name either.
Wrap Up
Yes, I could have easily set up a new Home Assistant VM and restored from a backup with very little fuss, but this project was more about learning of the power of Proxmox and virtual machines.
Can you set up Proxmox with Home Assistant for high availability, you may ask? Yes, but with some caveats. Proxmox high availability clusters are best ran with 3 nodes that vote in a system call quorum. Then you will also have issues if you are using a Zigbee or Z-Wave USB stick on your Home Assistant VM, for example. All this is getting beyond the scope of this post, and I really think that high availability is not needed for Home Assistant.
Previous Proxmox Posts
Set up a Home Assistant VM on Proxmox
Home Assistant on Proxmox – next steps